Google Chrome is the most popular browser. 70% of all internet users use Google Chrome to access the internet. However, the browser has annoying tendencies like forced features which come as frequent automatic updates. Although updates are important for security reasons, they can also be annoying when they interfere with functionality and are done too often. If you hate being forced to get used to new versions of Chrome repeatedly, here’s how to stop auto update google chrome in windows 7, 8, 10.
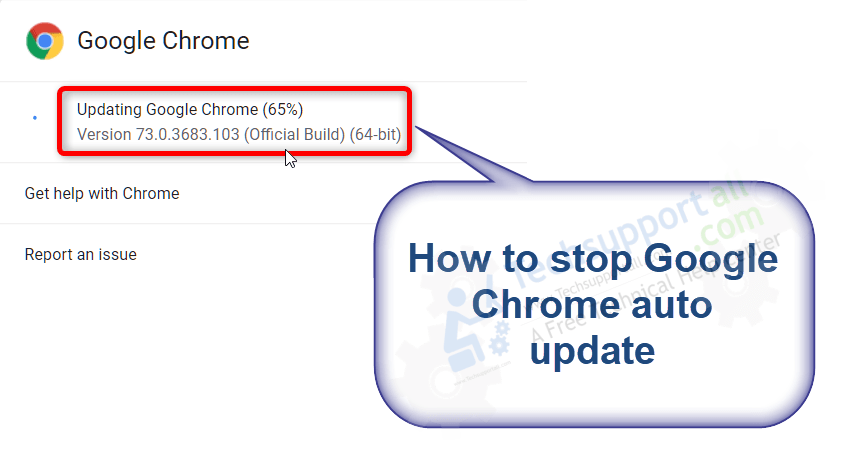
Here’s in this article we’ll show all the possible way where you can turn off the Google chrome automatic update. You’ll have to disable auto update from services, stop auto update of google chrome from registry, system configuration as well. Follow the following step by step guide how to stop auto-update google chrome in Windows.
How to stop auto update Google Chrome in Windows
Follow the following steps to stop chrome’s auto update.
Steps:
- Disable auto-update chrome from system configuration
- Stop auto-update chrome from service manager
- Turn off auto-update chrome from system registry
1. Disable auto update using system configuration
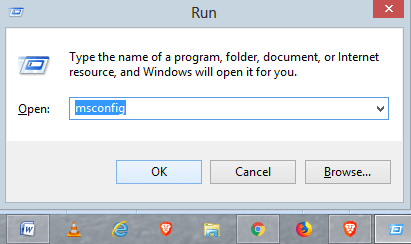
- Open Run command box using Window + R keys together.
- Type msconfig and click OK. A system configuration window will come up.

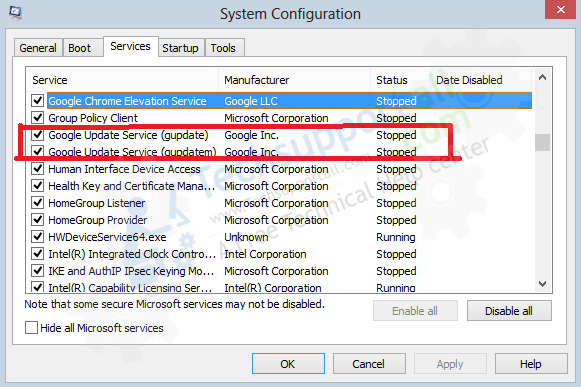
- In system configuration windows, click on the services tab.
- Select the checkbox “hide all Microsoft services“
- Now in this service’s list, look and deselect the Google Update Service (gupdate) and Google Update Service (gupdatem). You can find them easily by tapping on “G” on your keyboard.

- Click OK and restart your computer for the changes to be effected. When you check the services later, they should be stopped as opposed to running.
2. Stop auto update using Windows Services Manager
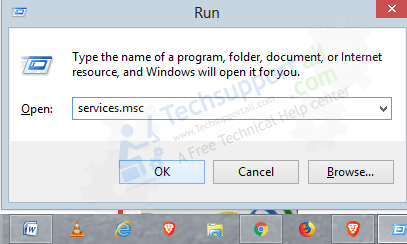
- Open windows Run quick command box again, type “services.msc” and then click on OK.

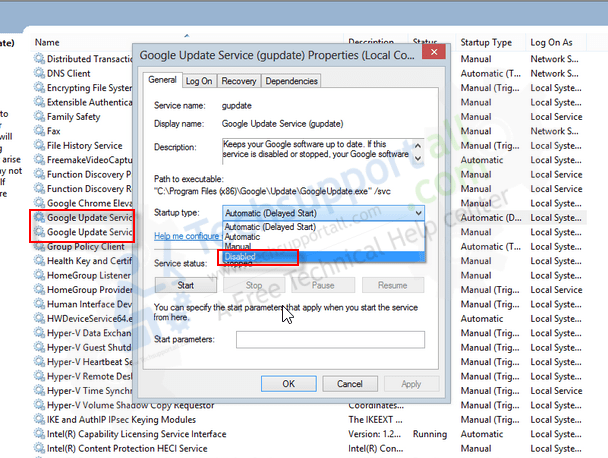
- Find the Google Update Services (gupdate) & Google Update Services (gupdatem). Do double-click on each of these services to open the properties.
- In properties, on the General tab, locate the Startup Type and select the Disable option in the drop down menu.
- Click OK. Do the same procedure for Google Update Services (gupdatem) as well.

3. Disable updates from registry
- Open Run by pressing the Windows + R keys together.
- Type regedit and click OK. A system registry will open.
- In system registry, go to the HKEY_LOCA_MACHINE → SOFTWARE → Policies.
- Create a new key and rename it to Google by right-clicking on Policies folder and selecting New + Key.
- Right-click on the Google folder and select new. Click on Key to rename the key to Update.
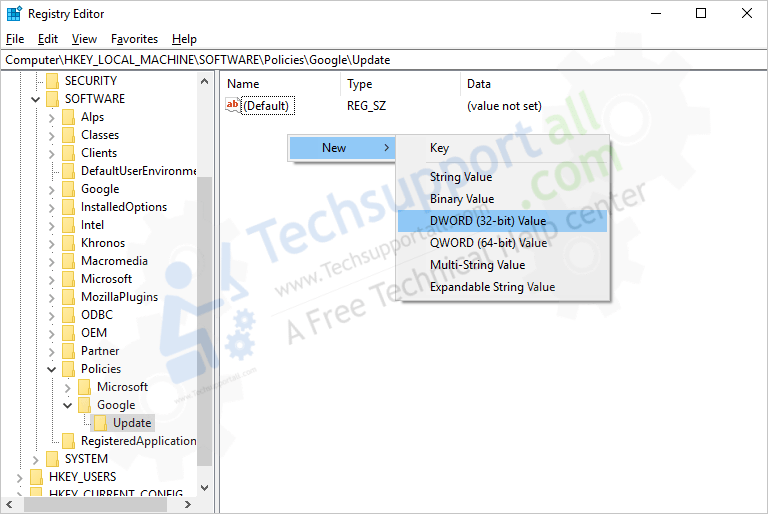
- Now click on update from left-side pane, and do right-click on the right-hand-side (on empty white space) and select NEW + DWORD 32.

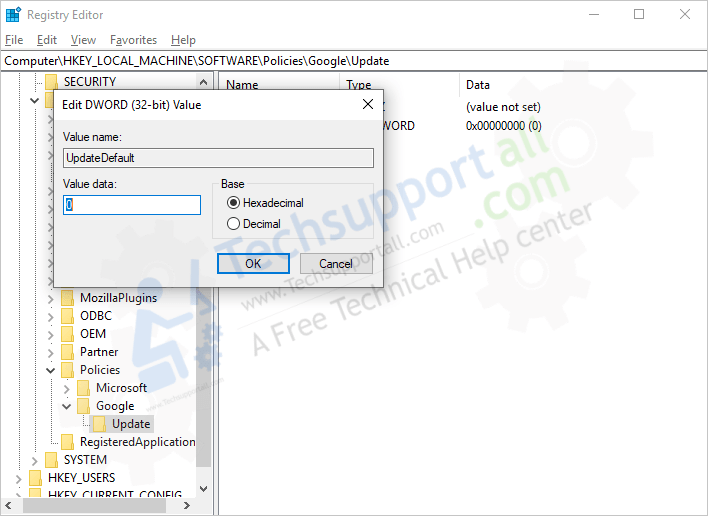
- Rename new key value name to UpdateDefault and value data to 0. Save changes by clicking OK.

If the above steps didn’t work or have any question in your mind, then please let us know in the comments section below, we’ll happy to answer you there.
