As a parent, it’s very normal to worry what your kids are exposed to on their devices, especially on the internet. The Internet is getting scarier by the day and hence requires constant vigilance to protect your kids.
Now, you can create a child’s account in Windows 10 and get the ability to monitor your kid’s activities. Initially introduced in Windows 8, child accounts take a regular user account, add some protection with Microsoft Family Safety, and then integrates it with Windows. With Parental Control in Windows 10, you can monitor and control what your kid does on his PC or phone like web browsing habits, time spent on devices, as well as the apps and games they can use.
Though some people consider this as spying, the ability to monitor your kids activities, becomes very useful, especially in an age of cyber harassment and bullying. It’s very easy to setup and use Windows 10’s Parental Control Feature. We’ll now go straight to how you can set up parental controls.
Creating a Child User Account in Window 10
Before setting up parental control in Windows 10, you have to create a user account for your child. Here are the steps to do it.
1. Click on the Windows Start Menu Icon and select Settings. You can also Press the Windows Key + I to open Windows Settings.
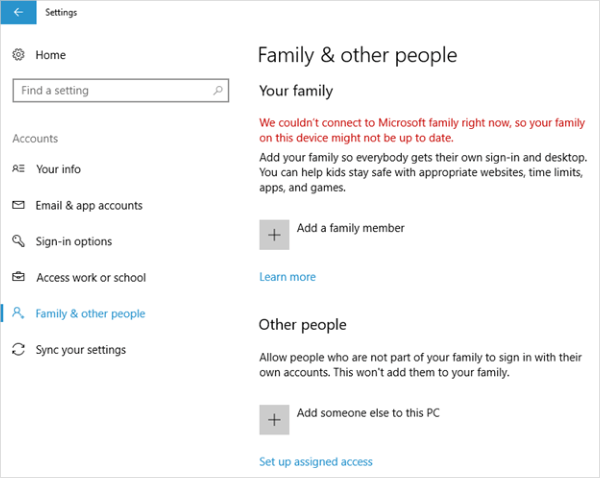
2. Navigate to Accounts -> Family & other users and then select Add a family member.
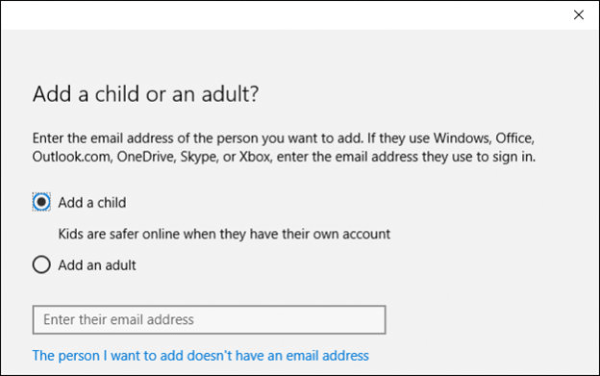
3. In the next dialog box that shows up, check Add a child and enter an email address if your kid already has one in the field below. Else, click on The person I want to add does not have an email address. It’s advisable to have a separate account for each member of your family.
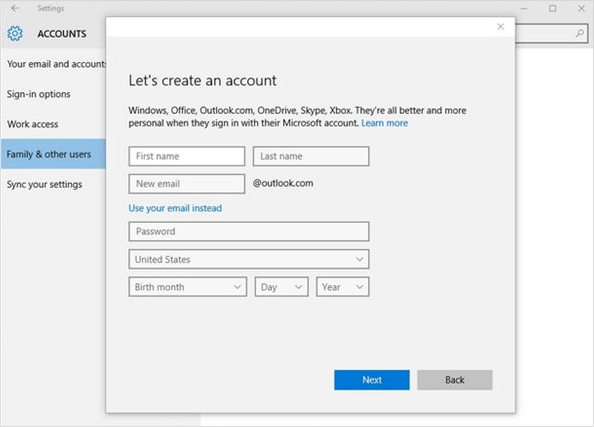
4. Next, provide the all the pertinent information needed to set up your child’s account. This includes your child’s name, date of birth, country, etc., along with the email you’d want to create.
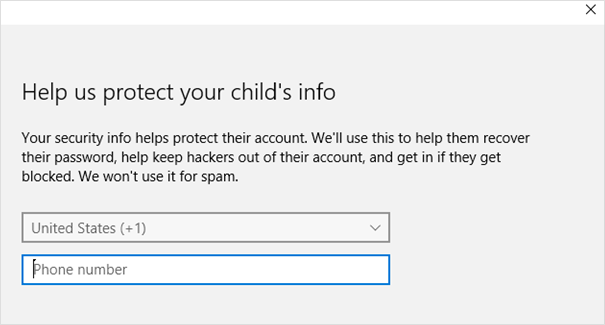
5. To provide additional protection to your child’s account, you’ll need to enter a phone number. This way if you’re unable to access the account in the future due to one reason or the other, you can have a code sent to your phone to that will let you reset it. If you prefer to use an email instead, click Add an alternate email instead at the bottom of the dialog box.
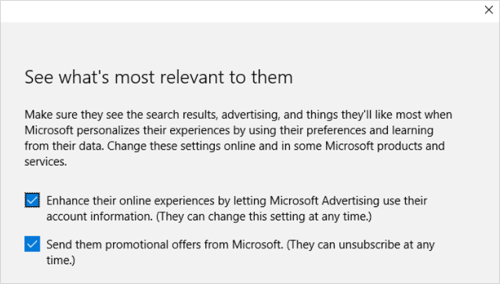
6. On the next dialog screen, you choose whether to share the account account information with Microsoft Advertising or allow Microsoft to send promotional offers. We suggest you uncheck them as these options are not particularly relevant to your kids.
7. You can now log into your child’s account and setup or configure their account settings using the Microsoft Family Safety tools online.
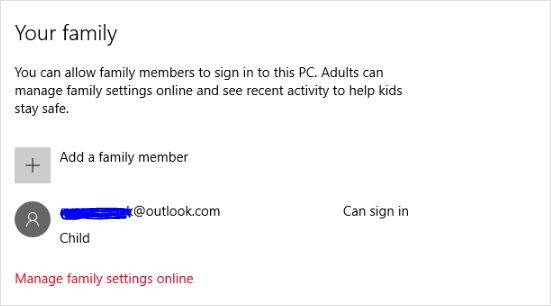
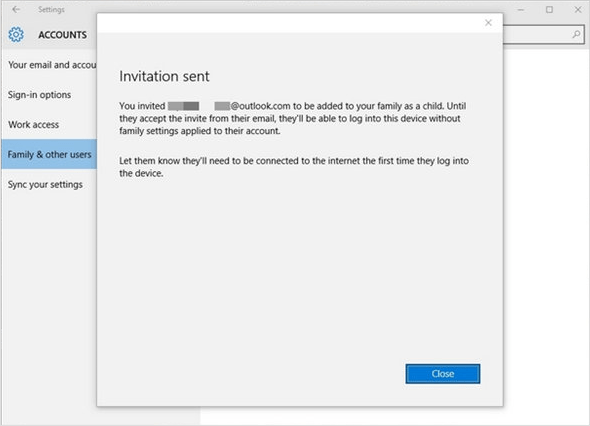
If you’ve already created an account for your child and you just added it to your Windows 10 installation, you’ll need to confirm from their account through the invitation sent before any family settings can be applied to their account.
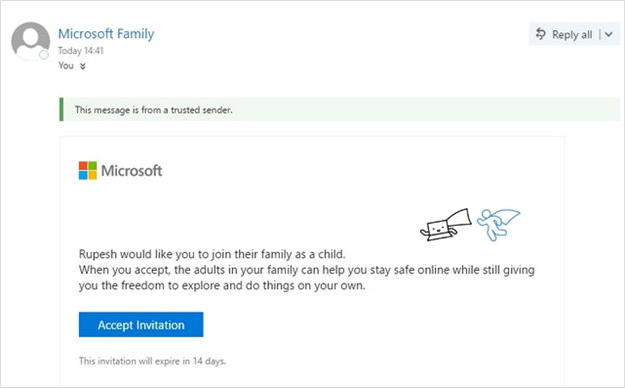
To do this, open your child’s Outlook mail, and open the invitation mail and then click on Accept Invitation. Until you confirm the invitation, you’ll see that their account is pending. Even though they will be able to sign in to the computer, the parental controls will not work. So make sure you confirm their account before proceeding to the next section.
8. A Join your family page will show. You will have to login again to confirm the invitation acceptance. When you’re done, you’ll be able to configure the child account.
Using the Windows 10 Parental Control Feature
With your child’s account added, you’re ready to use the Family Safety website to configure their accounts. Click Manage family settings online to open the website or click here to.
Some of the things you can do on your kids account are:
- Give your kids money to shop in Windows and Xbox stores without a credit card.
- See reports about that kids do on their devices, like app purchases and web searches.
- Set age limits for rated content like apps, games, videos, movies and TV.
- Set time limits for how long kids can spend on their devices.
- Locate your kids on a map, if they have Windows 10 smartphones.
Now, we’ll look at the options you can set parental controls on.
Recent Activity
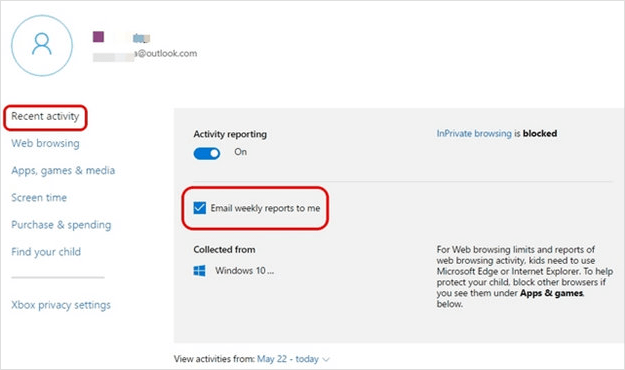
The recent activity settings collect your child’s activities and email reports to you. If you enable Activity Reporting, you will get reports of your kid’s browsing activities, apps & games and screen time. You can either enable the Email weekly reports to me option or check out all the activity. Note that Microsoft can only report web browsing activity if the child uses Internet Explorer or Microsoft Edge. If you want to strictly monitor web browsing activity you should block access to other browsers.
Web browsing
This is the most scariest experience for kids, because you never know who will send a harmful link or when an inappropriate ad pops up. That’s why it’s important you monitor your child’s web browsing habits. In the Web browsing section, you can block websites that you don’t want your child to visit. First step to this is turning on Block inappropriate websites and then you can add other inappropriate website under the Always block these section.
When SafeSearch is on, search engines will filter out inappropriate search results. Also, if the child is really young, can make make sure he sees only the websites you’ve allowed.
Apps, games & media
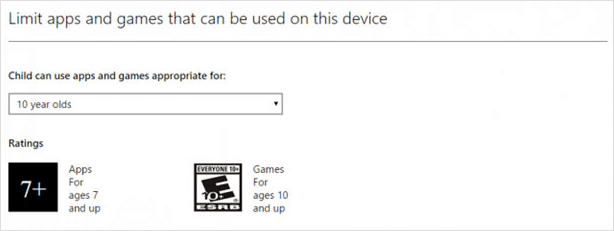
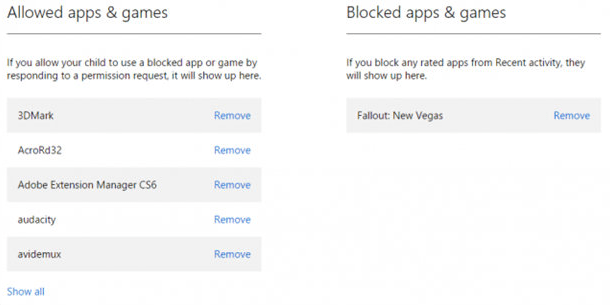
Games can be very addictive. And games now are more violent than they used to be. Thankfully, the Apps, games & media section allows you to ensure your kids don’t get their hands on inappropriate apps, games and other content. It lets you block apps and games that you don’t want your child to open. After turning on Block inappropriate apps and games, you can limit apps, games and media from the Windows store according to each child’s age. You can also block specific apps and games, just as you would with websites.
Screen time
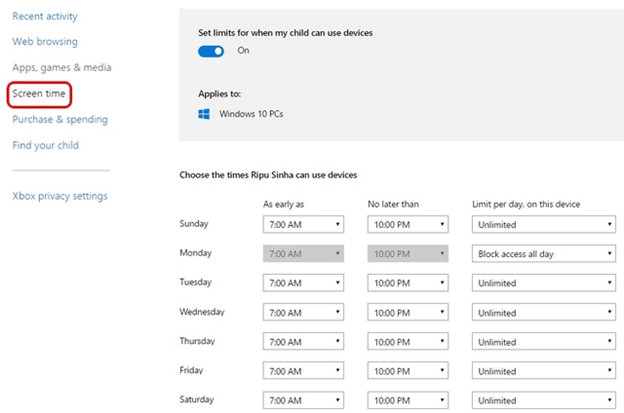
If you’re concerned about how much time you kid spends on his computer, you can decide the amount of time they can use on the device. In this section, you set limits for the amount of time your child gets to use his PC everyday. You can even limit per day usage if you wish.
Purchase & spending
In the Purchase & spending section, you can add money money to your child’s account to buy apps, games and media from the Windows store and Xbox store. You can ot money in their Microsoft account and remove other payment options, just so you put their spending under control.
Find your child
If your child has a Windows 10 smartphone or tablet, you can use this option to find out where they are on a map. It can only work if they same Microsoft account is associated with the phone. This becomes handy when you’re concerned about the whereabouts of you children.
Xbox Privacy Settings
Here you can monitor you child’s Xbox profile and choose if you want your child to see other people’s Xbox Live profile, use video for communications or share stuff with people. You can control these options for Windows 10 PCs, Xbox One & Xbox 360 consoles as well.
Microsoft has made it easy for parents to apply controls to their kids accounts. Having such controls in place will put your mind at ease and allow your kids to use their computer with less supervision. It’s however important you educate your children about being safe on the web too and not keep them in the dark. Also be a stop ahead of your tech savvy kids who are likely to find a way to bypass these controls.

And what can i do if my teen has local account in W10?
I should use other parental control program (K9, Time Boss, Kasper)?