Upgrading from Windows 10 / 11 Home version to Windows Pro version is simplified by the Microsoft. If you have installed a home version then you do not require to reinstall the pro version you can upgrade it without any hustle. Let’s discuss all about upgrading from Windows home to Pro version. The process is same on both Windows 10 and windows 11.
Why we need to upgrade from Windows Home to Pro version?
Windows comes mainly in two editions: Home for normal home users and Pro for professional users. The pro version provides some extra business level features. Check the difference between Windows Home and Pro So if you need the pro features, you may need to upgrade to the pro version. Another possibility is that you installed the Home version by mistake when you actually had the Windows License Key for the Pro version. So you can’t activate the pro keys in the home version. In this case, either you need to reinstall Windows or you can upgrade to the pro version from the already installed home version. So, whatever your reason for upgrading, let’s figure out how to make this transition from Home to Pro as smoothly as possible.
How to Upgrade from Windows Home to Pro?
Before you start the process of upgrading your Windows Home edition, make sure that your computer is fully updated and is running the most recent version.
To upgrade to Windows 10 Pro, follow the steps given below in their correct order.
Step 1
Open settings -> Update & Security

Step 2
Open Activation and on right hand side click on Go to the Store link. Or you can also search in the Microsoft Store app.
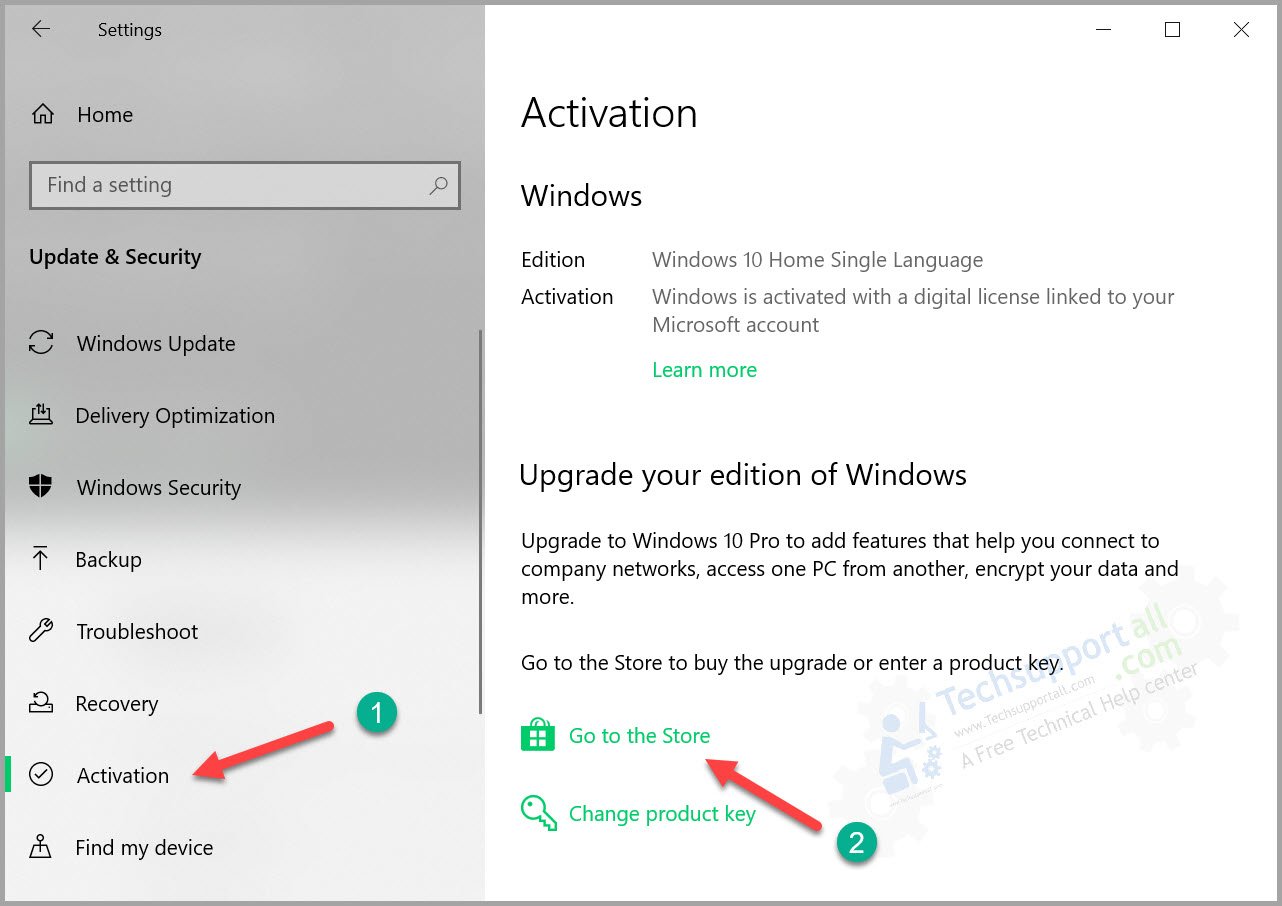
In Windows 11 go to Settings->System->Activation to open up this window.
Step 3
In this step either you can buy a new Windows 10/11 Pro license or If you already have a key then click on the link ‘I have a Windows 10/11 pro product key‘. By clicking on this link it will ask for the permission click on the ‘Yes‘ to allow it proceed further.
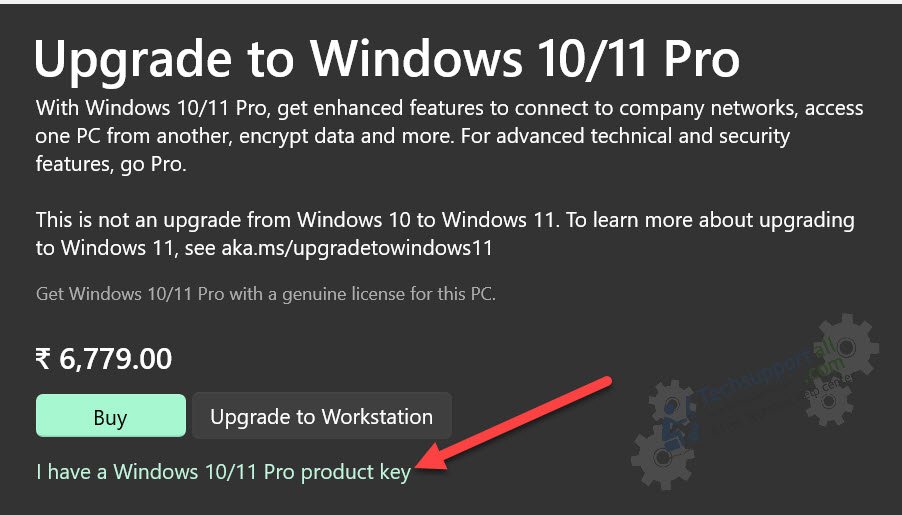
If you are going to buy then it will also ask the security pin or password and on completion of the purchase upgrade can be installed by clicking on the install button.

Or if you already have the key that it will open up the windows to enter the pro license key.
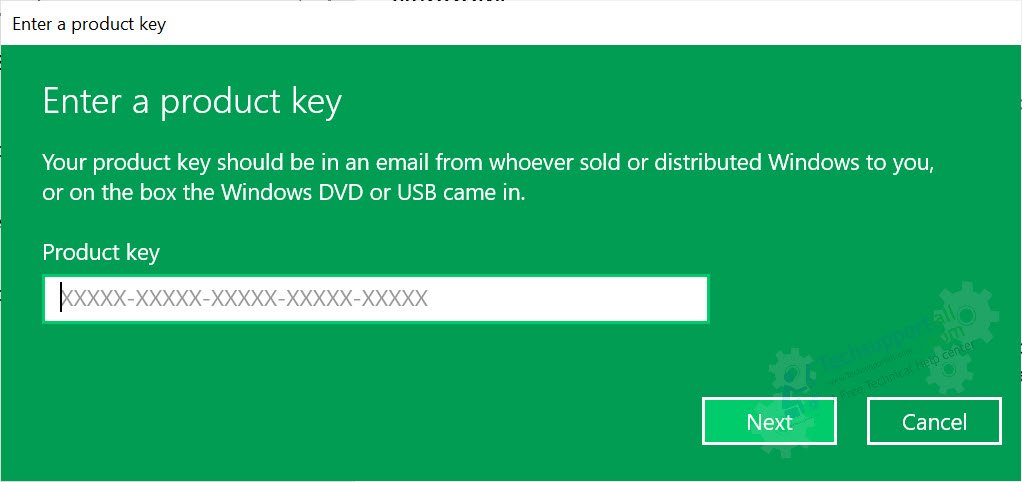
If you haven’t saved your files, then save them now. If your files are already saved, then select ‘Yes, let’s go’.

This will start the upgrade process. Your computer may restart a few times while it completes the installation of Windows 10 / 11 Pro.

After installation is complete. Right click the ‘My Computer’ icon on desktop and select ‘Properties’.

12. In the Windows Properties, you can clearly see ‘Windows 10 Pro’.

That’s it you have successfully upgraded your Windows 10 Home to Pro.
Although the process of upgrading to Windows 10 pro is pretty straight-forward and there very less room for error, but make sure that when you are executing this process your computer is connected to an uninterrupted internet connection.
when you can’t use a Pro key to upgrade from the Home version to the Pro version.
It happened to me. I downloaded the latest Windows 10 ISO image file and tried to install the pro version on my new system. But it was installing Home Edition by default. I tried the above method to upgrade the home edition to the pro edition. But it was not taking up my pro key. So I tried a new method to overcome this issue. I tried with a generic pro key provided by Microsoft, and then I was able to install the pro version. Then I switched out the generic key with the pro key I bought, and it worked to activate my Windows 10 Pro version.
The default Windows 10 product key that I used is
VK7JG-NPHTM-C97JM-9MPGT-3V66T
Please note that this guide is for upgrading the Windows 10 or 11 home edition to Pro edition. You may require to buy new Pro key to upgrade it. To upgrade to Windows 10 for free from previous versions use this guide : upgrade windows 7 to 10 for free.
