The error message “This PC can’t run Windows 11” on a Windows 10 system tells us that this system hardware is not compatible to upgrade to the Windows 11 operating system. Although there have always been minimum requirements for installing a program, game or operating system on a computer, but with its Windows 11 OS, Microsoft has released a list of minimum requirements, which leaves a vast majority of computers incompatible.
Therefore, a lot of users who want to test this latest operating system from Microsoft are left in the dark, as they don’t know how to fix “This PC can’t run Windows 11” error, which they encounter while checking the compatibility of their computer for Windows 11. If you are one such user, then don’t worry, because in this tutorial you will learn how to solve this error.
How to Check Your PC is Windows 11 Compatible?
The minimum requirements for Windows 11 can be found on the Microsoft website and we are sharing those requirements in the image shown below.

Why error “This PC can’t run Windows 11” occur?
Also, Microsoft provides a PC Health Check tool which you can download from their website and use it to determine the compatibility of your computer with the Windows 11.
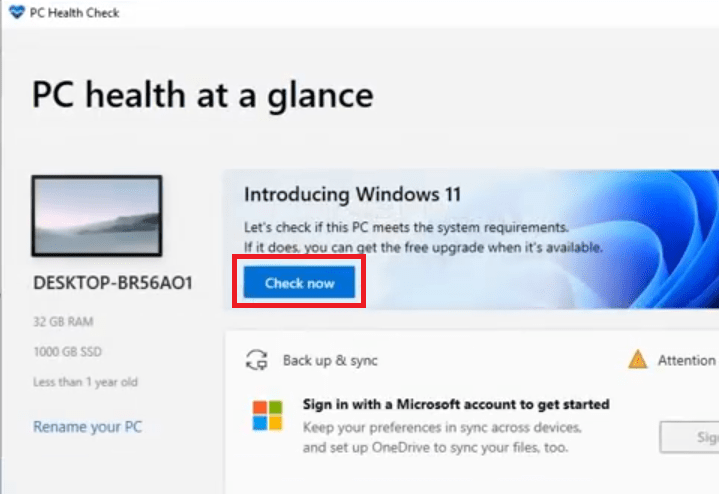
- Run the tool after downloading and click on the ‘Check now’ button.

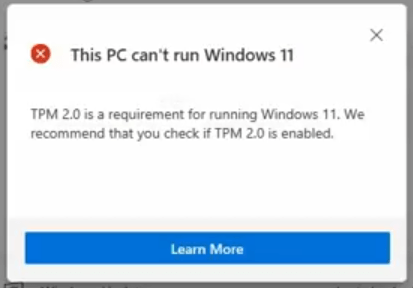
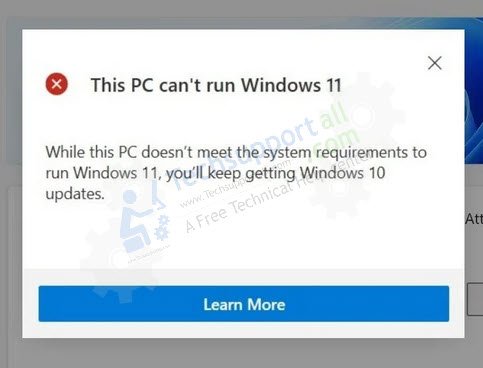
- If you see ‘This PC can’t run Windows 11’ message, then according to Microsoft your computer configuration will not support Windows 11.

Let us understand this error before we move ahead to solve it.
What Causes Windows 11 Incompatibility?
As you have seen in the previous section, the minimum requirements for Windows 11 are not much hard to get. A 9-inch+ Display, 4 GB RAM, 64 GB HDD, etc. are easy to find these days on most computers. However, there are some features which your computer might have, but they haven’t been activated. Also, Microsoft has gotten very strict on the list of processors which are compatible with Windows 11.
- UEFI, Secure Boot: Your computer must have UEFI. Some computers don’t have UEFI and in some cases it’s disabled. In both these cases that computer will not support Windows 11. If your computer has UEFI, then it will surely have Secure Boot, but you will have to enable it to install Windows 11.
- 64-bit Dual Core Processor: Microsoft wants you to have at least 1 GHz of processor speed with minimum 2 cores, built on a 64-bit architecture. This requirement is tough to fulfill for old computers. Therefore, if your computer doesn’t fulfill this criteria, then it would be difficult to install Windows 11 on your computer.
- TPM version 2.0: Some computers don’t have TPM 2.0 and in some computers it’s disabled. In both these conditions the PC Health Check tool will inform you that your computer will not support Windows 11. Know more about TPM and Windows 11.
If ‘This PC can’t run Windows 11’ error is displayed due to some lack of proper hardware, then you will have to arrange that piece of hardware. However, if your computer has that feature, but its disabled, then we can help you.
How to Fix “This PC can’t run Windows 11”
In this step-by-step tutorial, we will describe how you can fix this error. Follow each of the steps given below and don’t skip it, otherwise, the error will not be solved and you may have to perform the relevant steps again.
Solution 1: Enable UEFI, Secure Boot
Before you go on to enable UEFI and Secure Boot on your computer you will have to find out whether your computer supports this feature or not.
- Type ‘computer’ in the search box and select ‘Computer Management’ from the search results.

- In the Computer Management window, select the ‘Disk Management’ option. Now, right click the disk drive where you want to install Windows 11 and choose the ‘Properties’ option.

1) GPT Partition Style
- In the Properties, click on the ‘Volumes’ tab and look for Partition Style field. If it has GPT written in front of it, then your computer has UEFI enabled and you need to enable Secure Boot in BIOS.

- Restart your computer and press the relevant key to enter your system BIOS. Inside the BIOS go to the ‘Boot’ option.

- In Boot, you will find Boot Mode which should be UEFI and Secure Boot which should be disabled. Select Secure Boot option and press ‘Enter’.

- From the pop-up options, select ‘Enabled’ and press ‘Enter’ to confirm.

- When you see ‘Enabled’ in front of Secure Boot, this task is over.

- Now save the changes and exit BIOS.
We have described the above steps to only give an overview of what needs to be done. The options you have to choose in your BIOS for enabling Secure Boot can be completely different. Please, check those options by searching for the details about your motherboard BIOS settings.
2) MBR Partition Style
- In the Properties, click on the ‘Volumes’ tab and look for Partition Style field. If it has MBR written in front of it, then first you will have to convert your drive to GPT style. And after that follow the steps given in the above section to enable Secure Boot.

You must remember that when you will convert your system hard driver from MBR to GPT you will lose all data and you will have to reinstall your operating system. Therefore, in such a case, the whole process may become highly complicated for you. That’s why, we are not explaining this process.
Solution 2: Enable TPM 2.0
First you need to check whether TPM 2.0 is supported by your computer or not.
- Press ‘Win + R’ keys on the keyboard to open the run dialog box. Type ‘tpm.msc’ in the box and click the ‘OK’ button.

1) TPM is Enabled
- In the TPM window if you see that ‘The TPM is ready for use’ and Specification Version is ‘2.0’, then it means your computer is ready to run Windows 11.

It means ‘This PC can’t run Windows 11’ error is not coming due to TPM 2.0.
2) TPM is Disabled
- In the TPM window if you see that ‘Compatible TPM cannot be found’, then it means you will have to enable TPM in your system BIOS.

TPM option is mentioned is some BIOS as simply ‘TPM’, but in some BIOS settings (usually Intel processor) it’s shown as ‘PTT’. We will give one example for both these scenarios.
a) Enable TPM
- Restart your computer and press the relevant key to enter your system BIOS. Enter ‘Advanced Mode’ in the BIOS.

- In the Advanced section, choose the ‘PCH-FW Configuration’ option.

- In that section, you will find the option ‘TPM Device Selection’. Select ‘Firmware TPM’ or ‘FTPM’ for this option.

- Save the changes and exit your BIOS.
b) Enable PTT
- Restart your computer and press the relevant key to enter your system BIOS. Select ‘Settings’ tab.

- Inside Settings, choose ‘Miscellaneous’ option.

- Now, select ‘Intel Platform Trust Technology’ or ‘PTT’ and press ‘Enter’.

- Select ‘Enabled’ and press ‘Enter’.

- Once PTT option is Enabled, save all the changes and exit BIOS.

The above given procedure to enable TPM or PTT in your BIOS is just for reference. The actual steps for making these changes can be completely different on your system’s BIOS. Please, verify those steps by searching for the details about your motherboard BIOS settings regarding TPM or PTT.
Solution 3: Check Processor Compatibility
You must check that the processor of your computer is supported by Windows 11. To verify that follow the steps given below.
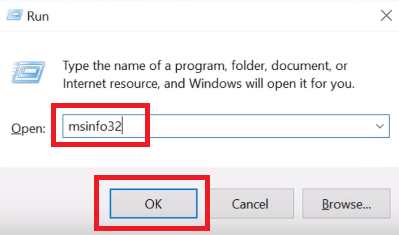
- Press ‘Win + R’ keys on your keyboard and open the run dialog box. Type ‘msinfo32’ in the box and click the ‘OK’ button.

- In the System Information window, you can find the complete details about your processor.

- You will find the links of the supported processors below. Click on the link associated with your processor manufacturer to find if your processor supports Windows 11 or not.
Supported AMD Processors
Supported Intel Processors
Supported Qualcomm Processors
If your processor is compatible with Windows 11, then you have fulfilled all the requirements of installing Windows 11.
Now, if you again check your computer with Microsoft PC Health Check, then you should see the message ‘This PC can run Windows 11’.
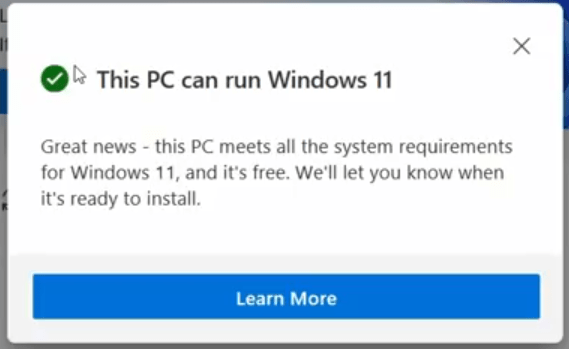
That’s it, you have successfully solved the ‘This PC can’t run Windows 11’ error on your computer.
More info : Check how to install Windows 11 on unsupported PC
Conclusion
Now you know how to fix “This PC can’t run Windows 11” error on your computer. Windows 11 has a lot of amazing features, but its strict hardware requirements is a big hurdle for users who want to try this newest OS from the Microsoft. However, if you study this tutorial carefully, then you will be able to get rid of the issues that most users are facing with the hardware and software compatibility checks.
