It is everyone’s desire to have a computer that speeds like a super computer. The speed is realized when a fresh Windows is installed but after sometimes the startup-speed and shutdown-speed become down day-by-day. Is your Windows 10, 8, 7 take long time to shutdown too? If so, it means there must be a problem with the Windows settings or system files. To optimize your Windows 10 shutdown & restart speed, here are a few steps that can fix this slow shutdown issue.

Steps to Fix Windows 10 Slow Shutdown
To fix this, you’ll need to modify some system registry values using the Registry Editor.
Let’s see how to do it……
Step 1:
Open the registry editor by typing “regedit” in the Run box. Run box will be open up by pressing Windows + R buttons.
Step 2:
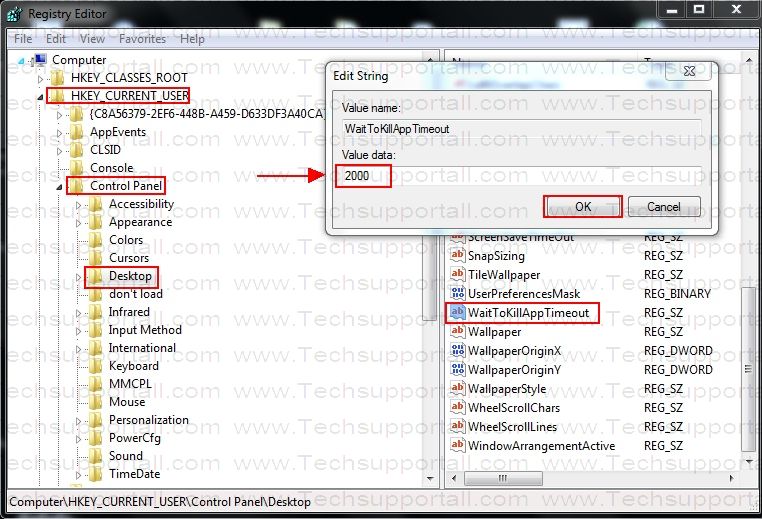
Navigate to the following registry path: HKEY_CURRENT_USER\Control Panel\Desktop
Step 3:
Look at the right-side pane and double-click on the WaitToKillServiceTimeout and change its value to 500. The default value is 2000 Milliseconds you can set to 500 MS to kill the app. (See the following screenshot)

Step 4:
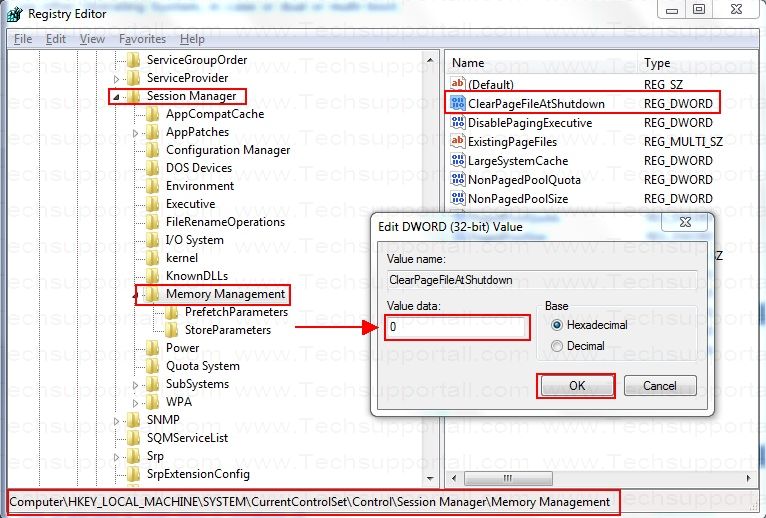
Navigate to the following location in the registry editor: [HKLM\system\CurrentControlSet\Control\Session Manager\Memory Management]
Step 5:
Look at the right-side pane and double-click on the ClearPageFileAtShutdown and change its value to 0 (See the following screenshot)

Step 6:
(for XP, Vista and Server 2000 users only)
Open group policy – press Windows + R keys together and type Secpol.msc and click OK to open in group policy.
Step 7:
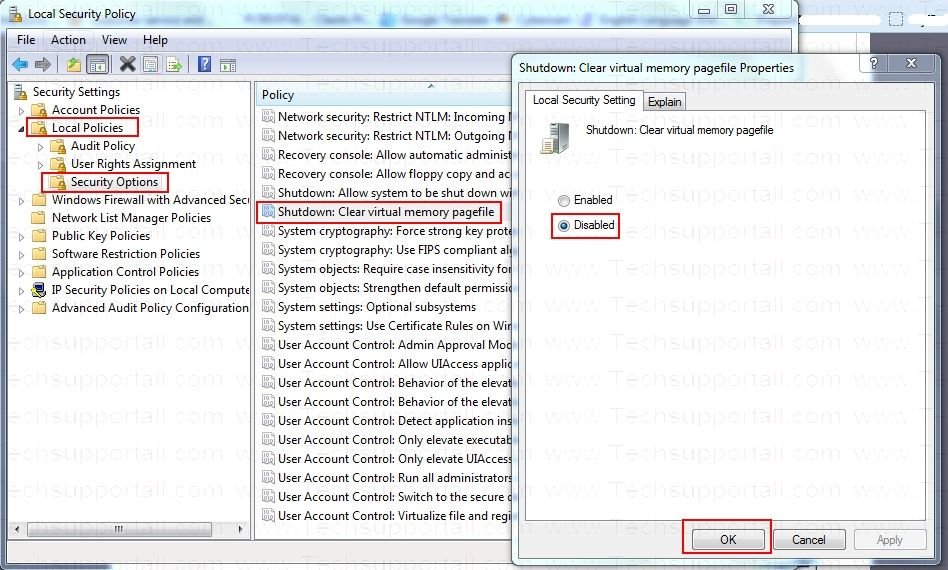
In the group policy, click Local Policies >> Security Options.
In the right-pane, double-click on the “Shutdown: Clear Virtual Storage Pagefile” and then choose the disabled option (See the following screenshot)

That’s it.
In this tutorial you have learned how to fix slow shutdown problems. Leave your experience in the comments section down below.
shut dowun but bluscree and restart
Thank you very much !!!! Solved my issue