IP Configuration error is related to network issue either you are connected with LAN cable or via WiFi. Text of the error also changed accordingly. If you are connected wirelessly that it may show error like “Wifi doesn’t have a valid IP configuration error”. And if your connected via cable then it will show the error “Ethernet doesn’t have a valid IP Configuration”. This is not a serious error and can be resolved easily.
Why you get the “Ethernet doesn’t have a valid IP configuration” error?
When we connect to a network or router it assign a unique IP address for each device. IP address is essential to recognize a device. In Windows 10 everything happened automatically and an IP address is assigned automatically. But some times due to some network misconfiguration or any other reason system display this error.
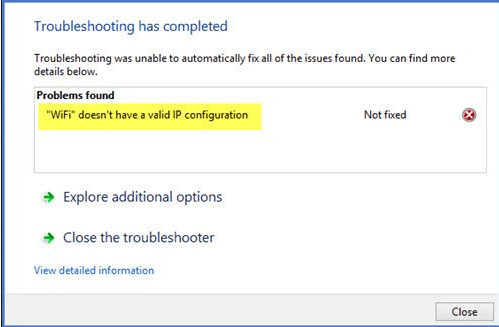
How to Fix “Ethernet doesn’t have a valid IP configuration”
There are lots of ways to fix this Ethernet IP configuration problem in Windows 10.
Fix 1: Restart your router / modem and computer
We have always insisted that sometimes the simplest solution is the right one. So before entering into complicated configurations, please try the most obvious solution. This involves turning the device off and on again. Occasionally, this can solve small errors and leave everything correct. So first turn off the router and wait a few seconds before turning it back on. If after this, the error persists then restart the computer. If the error is not corrected, then try turning off both devices for a few minutes. If the problem still exists then move to the next steps.
Fix 2: Run network troubleshooter
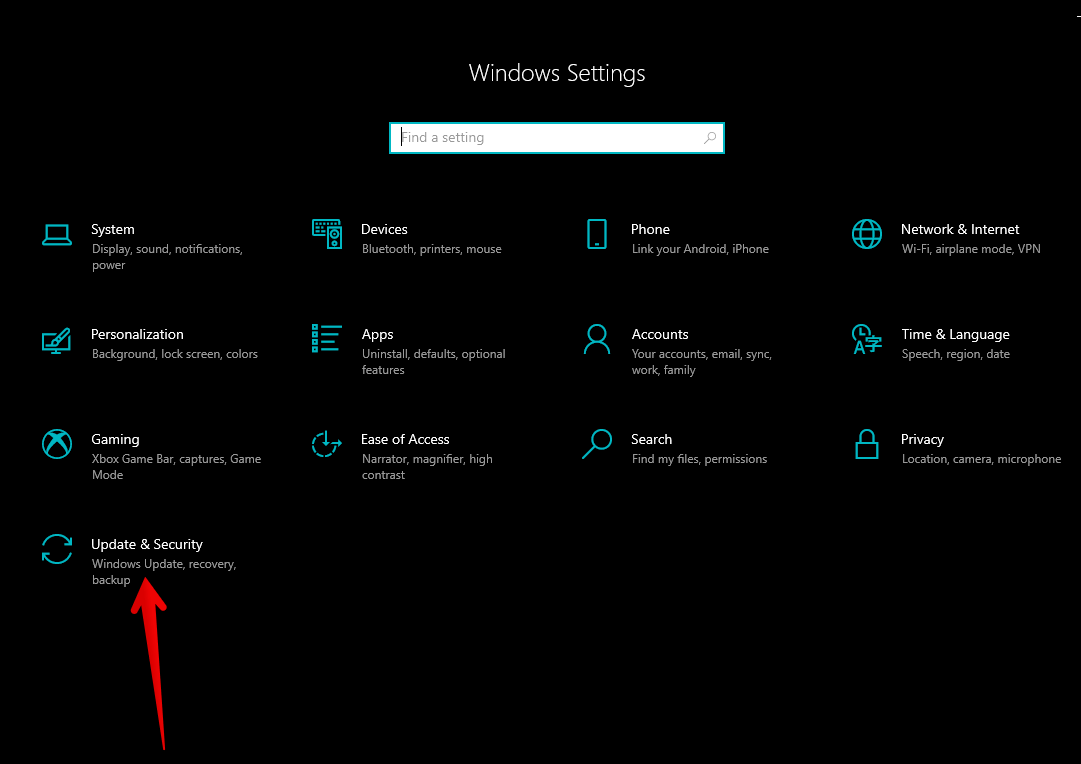
If a simple restart doesn’t work that the first thing that should try next is, run the Network Troubleshooter. Windows has an inbuilt troubleshooter to fix the network related issues. It may be able to detect and correct the problem effectively. With this in mind, press the Win+I combination to enter Windows Settings.
1. Open Windows Settings. Click on Update & Security.
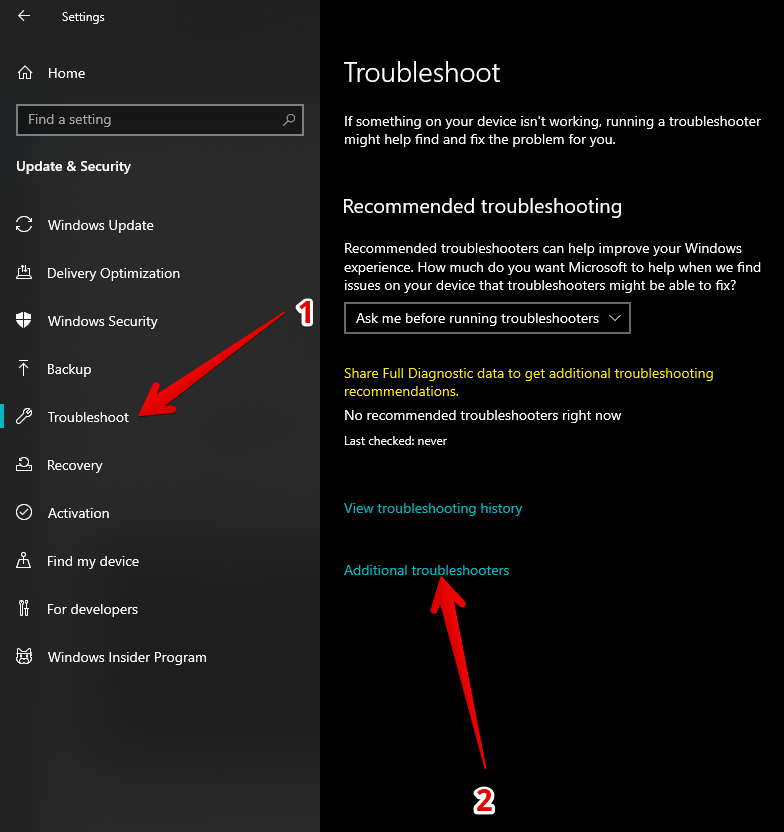
2. Select Troubleshooter from the menu on the left. Then in the right column, click on Additional Troubleshooters.
3. In the new window, please click on Internet Connections and then click on Run the Troubleshooter.
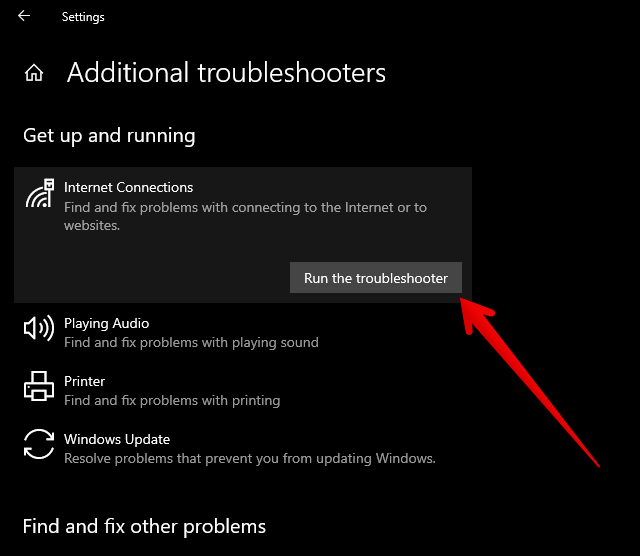
Hopefully this troubleshooter will fix the issue. But if it is not able to fix then don’t worry there are more additional fixes available to fix this.
If the problem is still persists then it could be a serious issue, But still we can fix it by doing some more steps mentioned here.
Fix 3: Update the network adapter drivers
It could be the issue of some outdated software. So next is to update the network drivers. Sometimes updating a driver, fix the issues quickly as it fixes many corrupted files or other configuration immediately. If you want to know how to upgrade hardware components please check these tutorials.

Fix 4: Reset the connection values
Next is to reset the IP and DNS values. In technical language it is called flushing the DNS. To do this, you need to launch a command prompt with administrator privileges. With this in mind, press the Win+Q combination and in the search bar, please type CMD. Run it as an administrator.
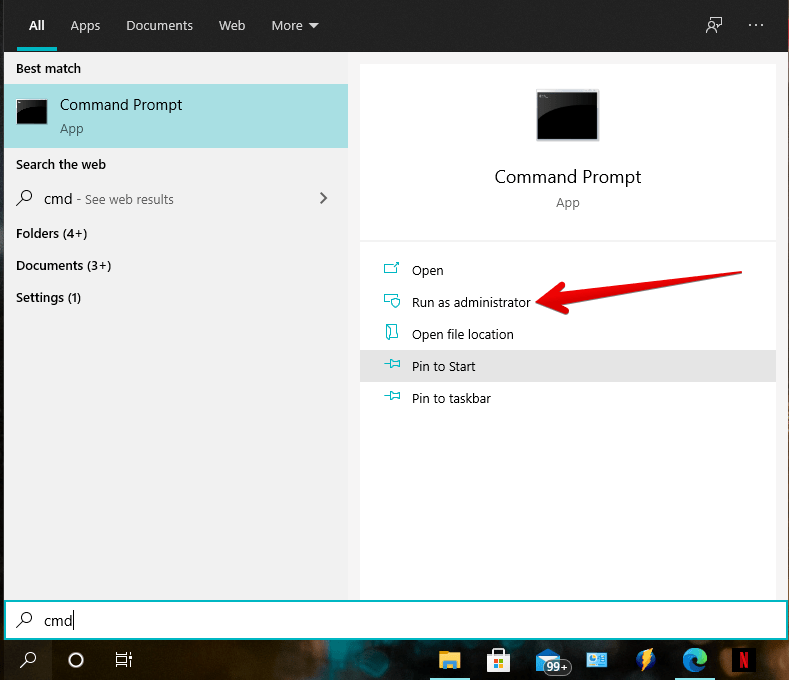
Then execute the following commands one by one:
ipconfig-release
ipconfig-flushdns
ipconfig-renew
Please remember to press Enter after each command to run it. These command will reset the IP and DNS data and will hopefully also solve the issue related to invalid IP configuration. Otherwise move to the next step.
Fix 5: Resets TCP IP sockets
Taking advantage of the fact that we have invoked the CMD with administrator privileges, we are going to introduce another command. This will allow us to restore the sockets. It makes two programs exchange data between them safely. So it launches the CMD as administrator as in the previous section. Then disconnect the Ethernet cable from the computer. Immediately execute the following command:
netsh winsock reset

Now press Enter to execute the command. Please restart the computer and reconnect the Ethernet cable or your wifi connection.
If none of the above method work then next step should be to configure the things manually.
Fix 6: Make sure network is obtaining IP address automatically
It is well known that the router assigns the IP address automatically. However, this option can be overridden in network settings and IP address could be assigned manually. Some times some one has assign the static IP address manually and you forgot about it. So now you have to set the settings to obtain the IP address automatically. To fix this, the first thing you have to do is press the Win+R combination and execute the following command:
ncpa.cpl
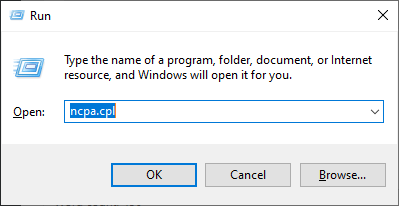
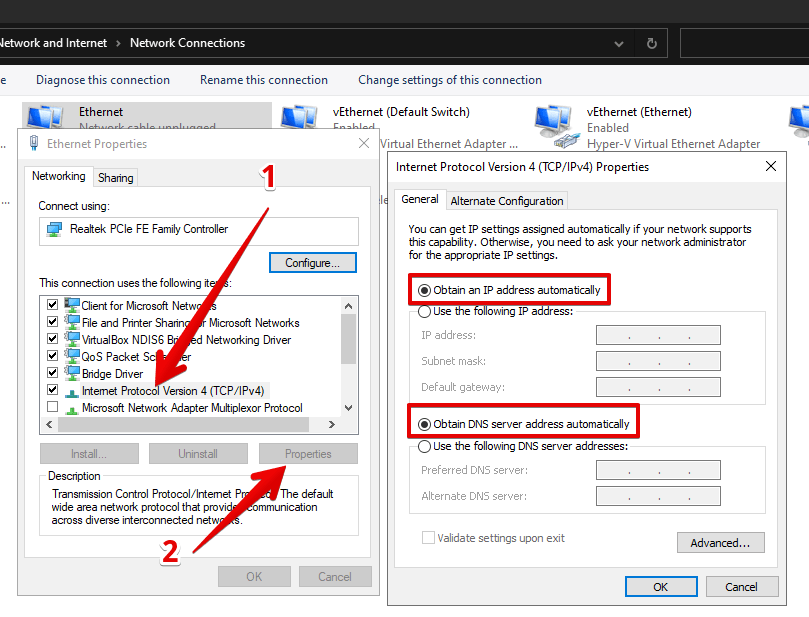
Network connections will be deployed immediately. Please right-click on the Ethernet to enter the connection properties.
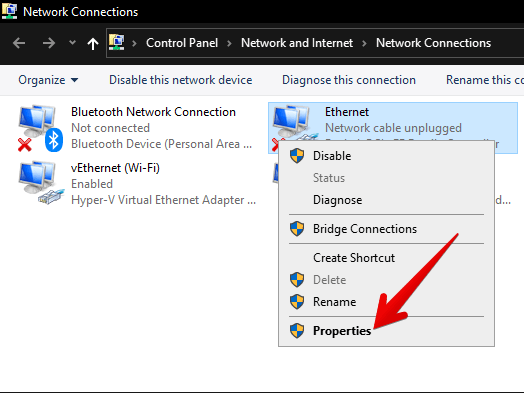
Now scroll down until you click on Internet Protocol Version 4 (TCP/IPv4). Now click on Properties. A window will immediately pop up. Once there, make sure the following option is activated: Obtain an IP address automatically and Obtain DNS server address automatically. After doing so, please restart the router.
Hopefully these above steps will fix the issue successfully, Otherwise the only hope remains is to assign a Public DNS address automatically.
Fix 7: Try Assigning DNS Manually
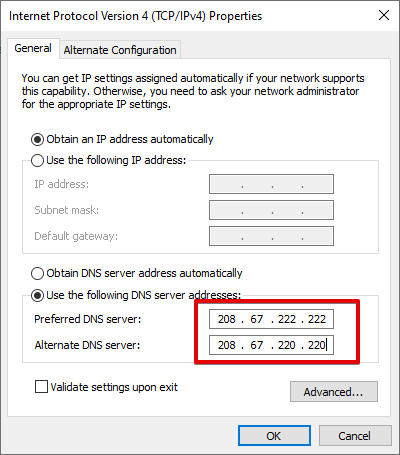
If the problem persists with the previous steps, you can try to modify the DNS and assign a Public DNS manually. Check the list of best public DNS servers here. Since these are automatically assigned by your network provider. With this intention, follow the same steps as above. Instead of letting the DNS be obtained automatically, you should add it manually. For the purposes of this example you can use the OpenDNS values, whose primary and secondary DNS are 208.67.222.222 and 208.67.220.220.
If even the all the above method fails then there could be probability that the issue is with the router and not with the computer configuration. So to further investigate the error “Ethernet or Wifi doesn’t have a valid IP configuration” you need to check the router settings for IP Conflicting or contact the Internet service provider.
