Hello, today we’ll talk about the connections problem in Windows 10 PCs. It’s well known that when you connect an Ethernet cable to the network port, Windows automatically configures the connection. However, when we want to connect to a wireless network, the procedure is different. If the network is open, just click on it to connect. Now, generally the networks are protected with passwords, so we must enter the password to access the network. But sometimes it happens, that we enter the password correctly and still can not connect. In these cases, the system throws an annoying message “. Can’t connect to this network on Windows 10“. Under those circumstances, let’s see how to fix this error and successfully connect to a wireless network.
How to fix can’t connect to this network
To fix this connectivity problem, you just need to follow the following methods.
- Checking the Wi-Fi connection
- Forget the connection to solve the connection problems
- Uninstall the network adapter
- Update the network driver
- Modify the Wi-Fi connection channel
- Disable IPv6 connectivity
- Troubleshoot connection problems using Command Prompt.
1. Checking the Wi-Fi connection
Sometimes the simplest solution is the right one.
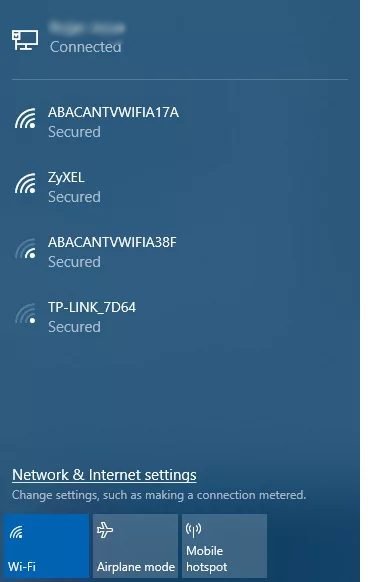
- Click on the network icon to check the status of your connection and show the available connections.

- After this, try to connect to the network. If the problem persists, move on to the next solution.
2. Forget the connection to solve the connection problems.
Every time you connect to a new network, Windows saves the network name and password. In this way, the connection to the network will be made faster. However, it is probable that the data of the network will be modified, or the same one will be erased. This will make it impossible for us to access it.
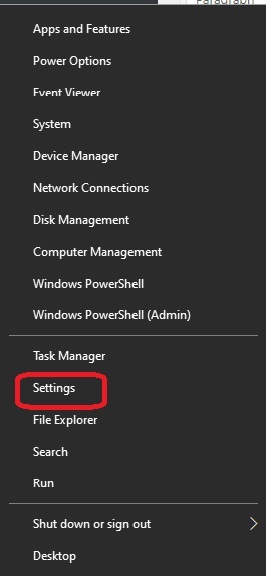
- To solve this problem, what we will do is, forget this network and then enter the data again. With this intention, please click on the combination “Win + X” and go to “Settings“.

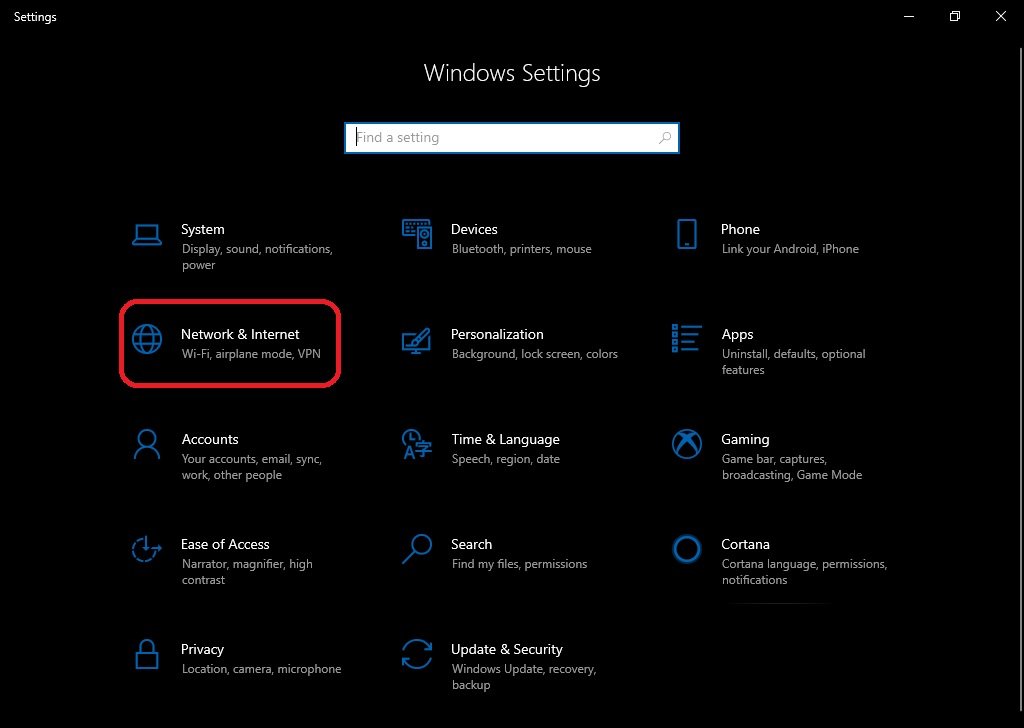
- Then select Network & Internet.

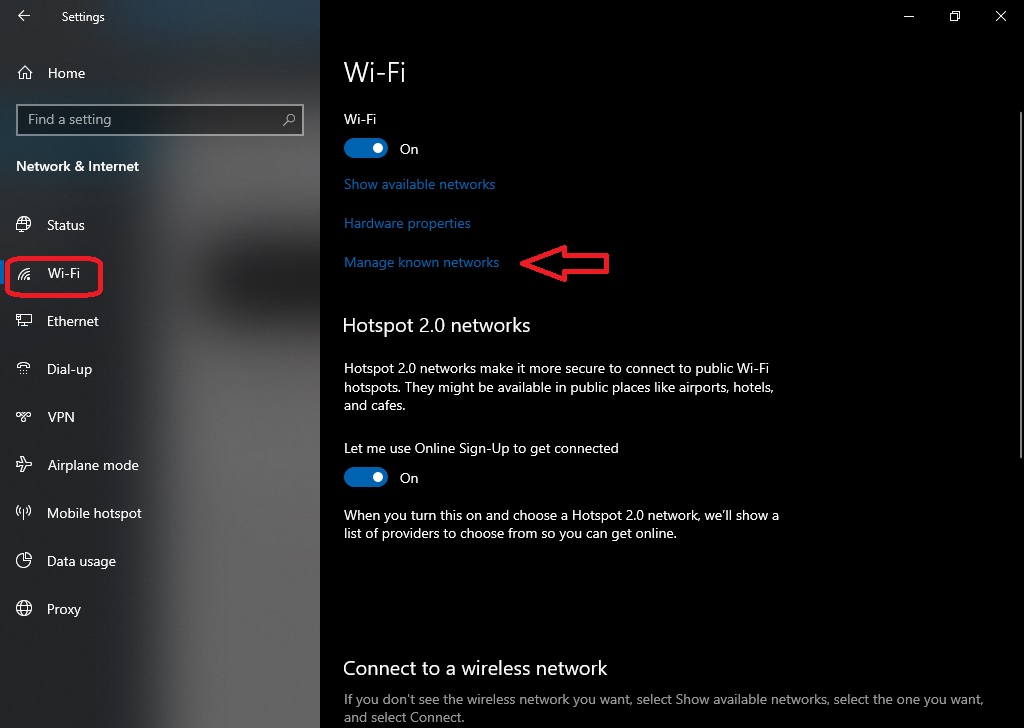
- On the next screen, select Wi-Fi in the left column, and then Manage known networks in the right-side menu.

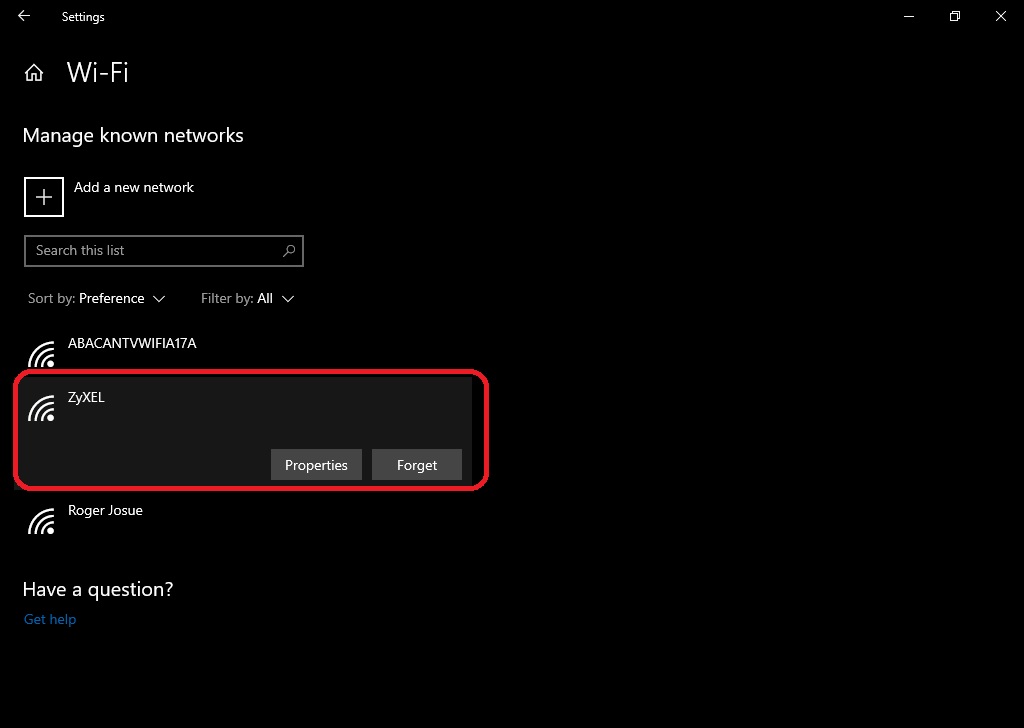
- Select the network you used to connect to and in the lower menu press Forget. This will remove the registry from the network. Now you must manually connect to the network and check if the problem was solved.

3. Uninstall the network adapter.
The first step we will try is to uninstall the wireless network adapter. Don’t worry, once you restart the computer, Windows will install the adapter again and should solve the problem.
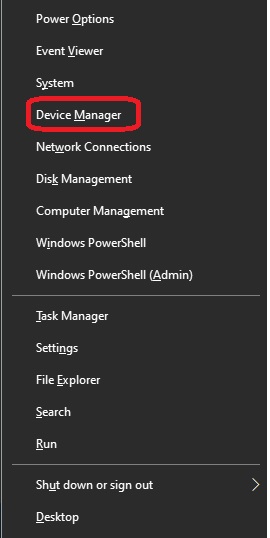
- Press the “Win + X” combination. Then select Device Manager.

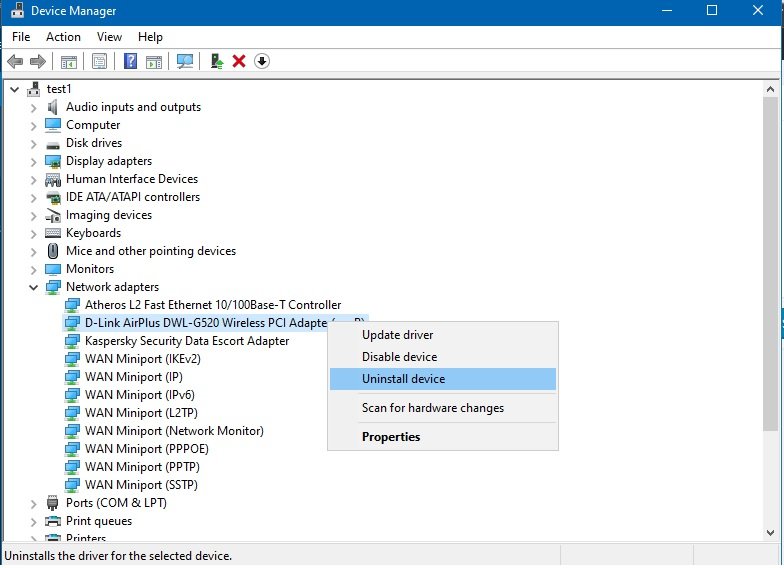
- Next, locate the wireless network adapter, right-click on it. And proceed to uninstall it, If asked, check “Delete the driver software for this device” and click OK.

4. Updates the network driver.
If the above solution does not work, then you may need to update the network adapter driver. When you are connected to the internet, this procedure is very simple. Simply enter Device Manager, right-click on the network adapter and select Update Driver., but we’re not supposed to be able to connect to the network, so it’s best to check the exact model of the adapter.Go to a computer that does have an internet connection, download the latest driver and save it on a USB drive. Subsequently, take it to our computer and manually update the adapter. If the problem persists, proceed to the next solution.
5. Modify the Wi-Fi connection channel.
In case of not being able to connect to a Wi-Fi network, what we will do is change the Wi-Fi connection channel as the selected channel may be saturated with too many connections which result in connectivity failures.
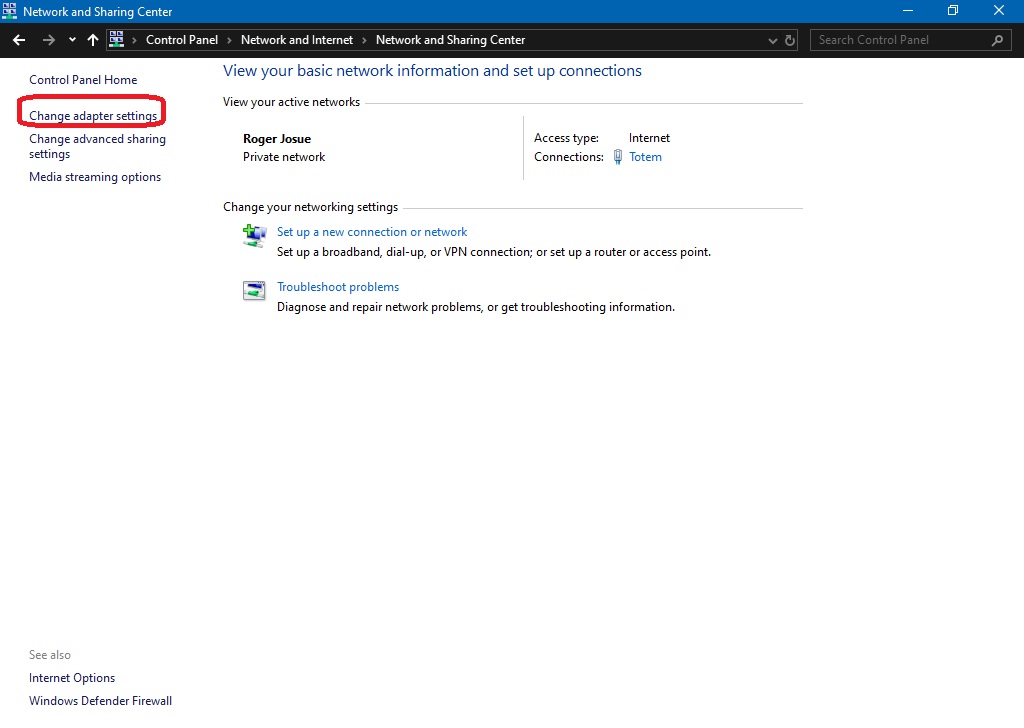
- To achieve this please follow this path: Control Panel → Networks and Internet → Network and Sharing Center. Once there, click on Change adapter settings.

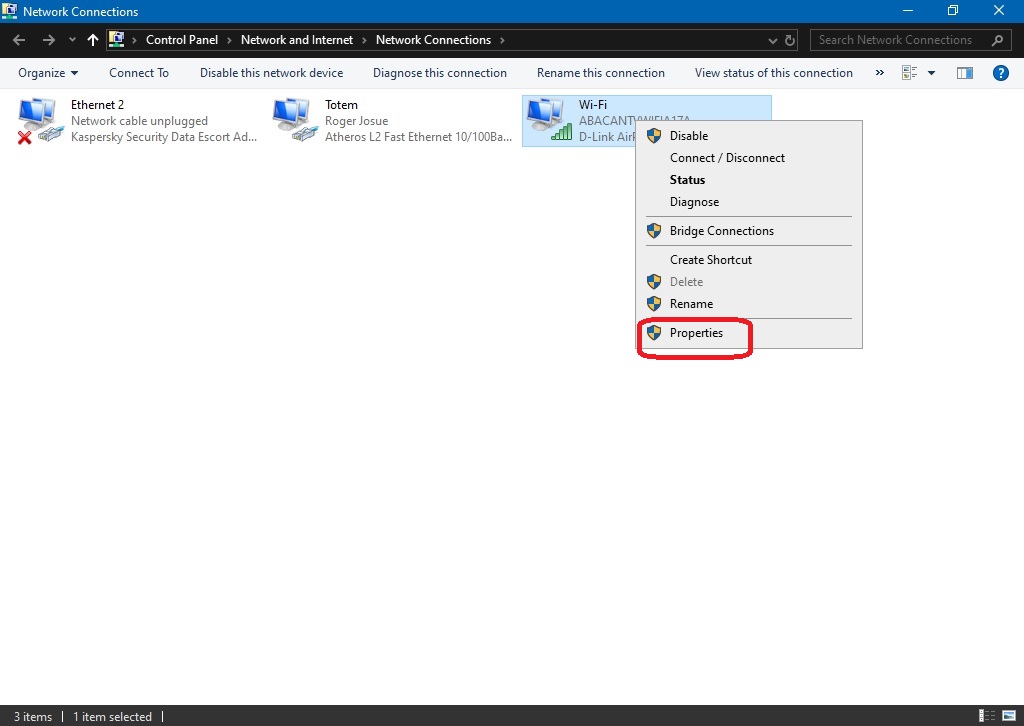
- In the next window right click on the wireless network adapter and select properties.

- In the pop-up window, please click on “Configure”.

- In the pop-up window, please click on “Configure“. Locate the tab “Advanced” you can choose the most appropriate value for the connection in “Wireless Mode” as well as modify the value of the preferred channel.
- Select the appropriate values for your network and press OK to accept.
6. Disable IPv6 connectivity
Sometimes this error is caused because our equipment is connected using the IPv4 protocol. So we have enabled the protocol IPv6 is likely to occur connection conflicts. So to avoid this problem, let’s disable it.
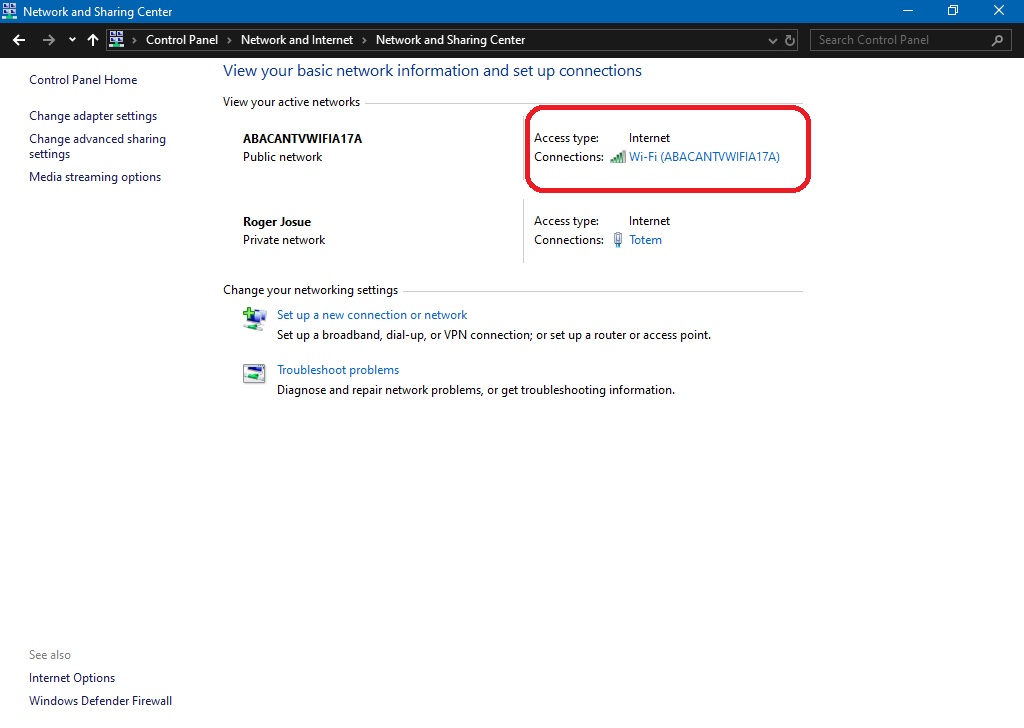
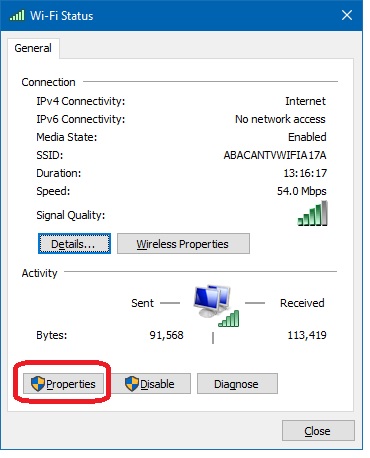
- Follow the same path mentioned above: Control Panel → Networks and Internet → Network and Sharing Center. But when you’re there, click on the wireless connection.

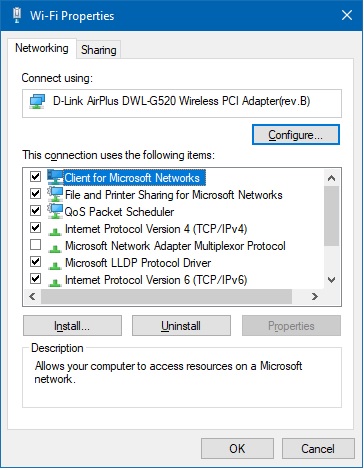
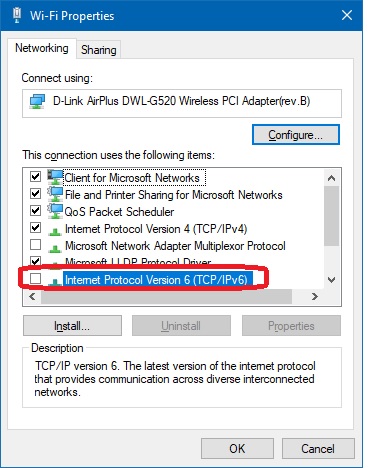
- Next, click on properties.

- Now navigate to the Internet Protocol Version 6 (TCP/IPv6) option and uncheck the box. Then press OK to accept the changes. Reboot the computer to confirm the changes.

7. Troubleshoot connection problems using Command Prompt.
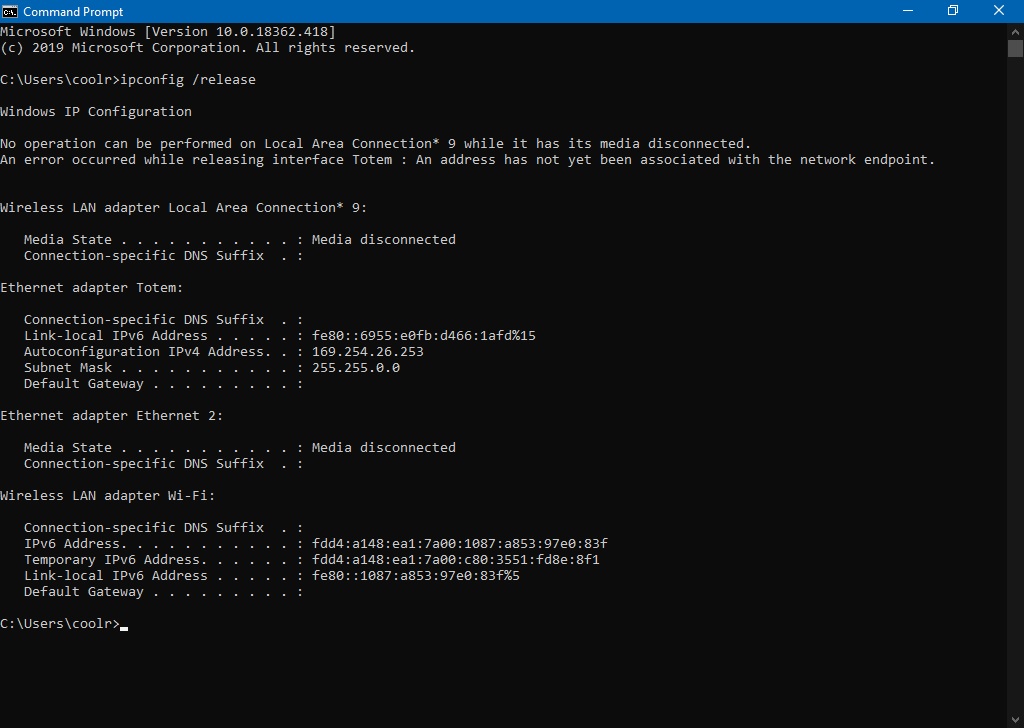
If all of the above solutions have failed, we will try to solve the problem using the CMD console. First, we will release the IP address using the following command:
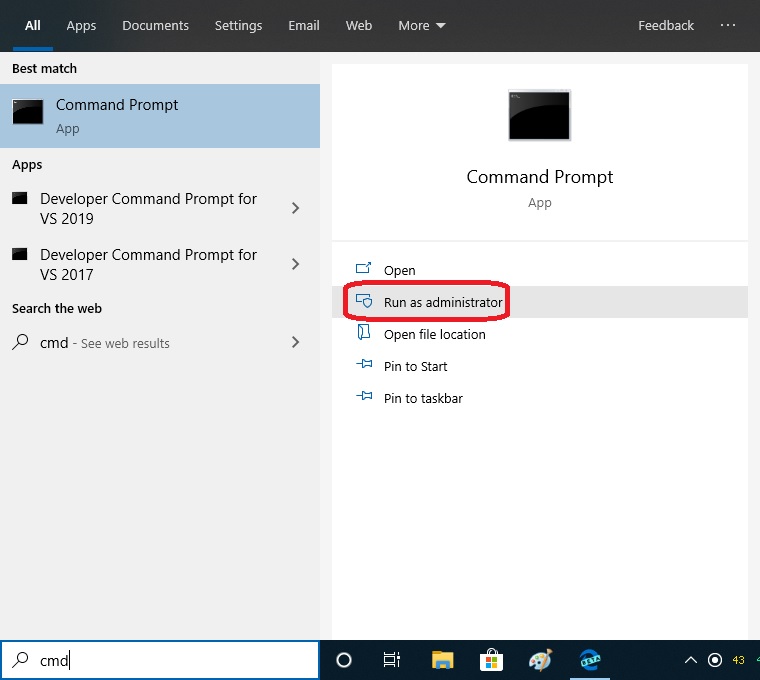
Please open a CMD with administrative privileges. Please type CMD in the search bar, and then select Run as administrator.
Copy the following command (ipconfig /release) into the CMD command line and then press enter button.
ipconfig /release
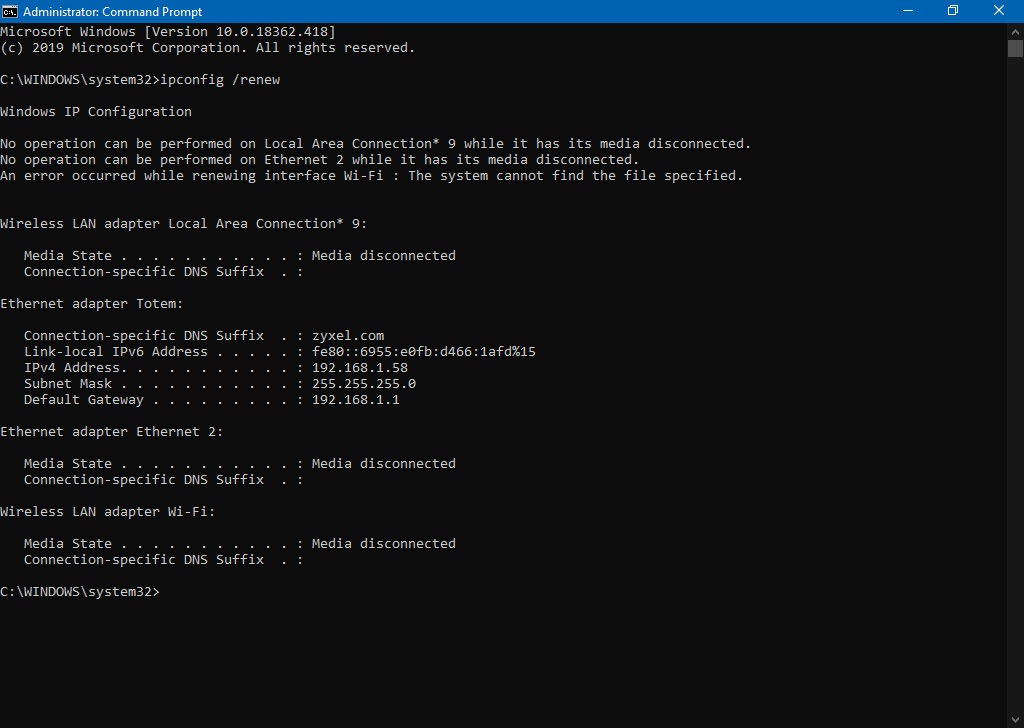
Now we will renew the IP address using the following command:
ipconfig /renew
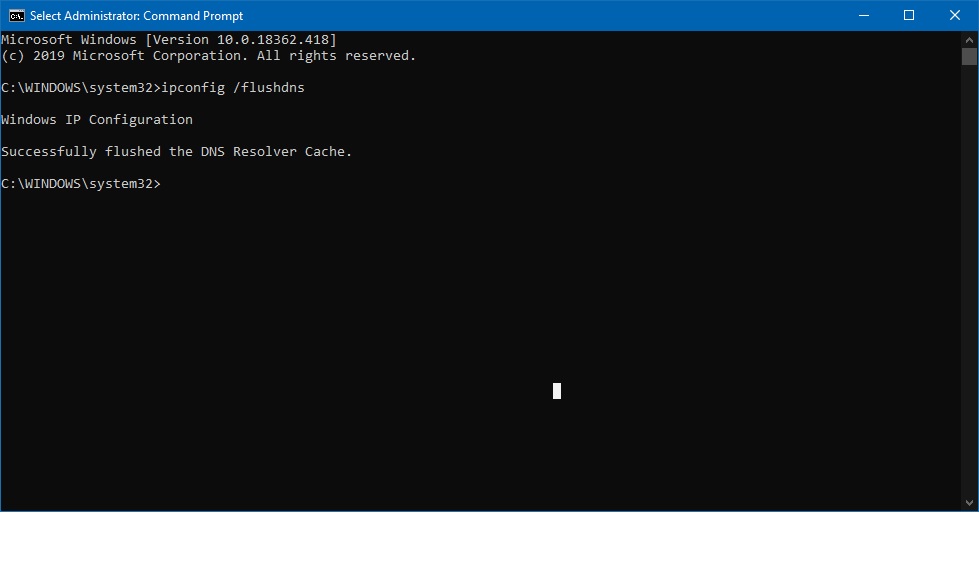
ipconfig /flushdns
Now we’ll see some solutions to this connection error after updating the computer. For this case, we must access as administrators to the command prompt and then execute the following command:
reg delete HKCRCLSID{988248f3-a1ad-49bf-9170-676cbbc36ba3} /va /f
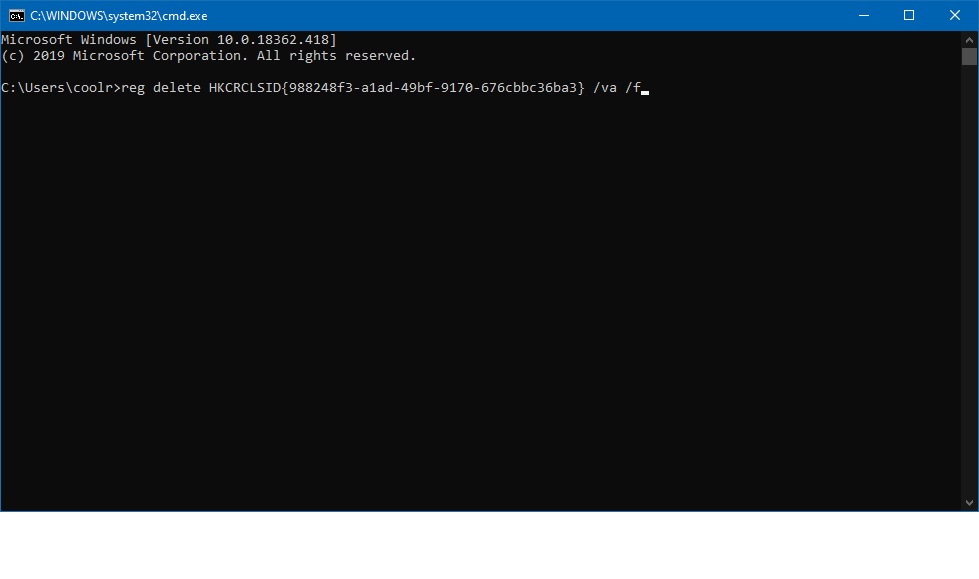
Press enter and then execute this command:
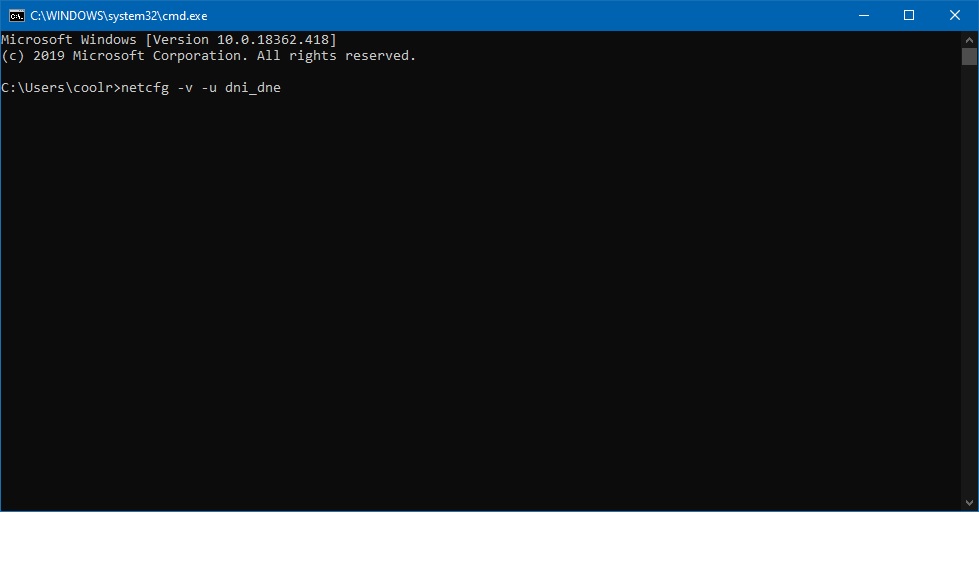
netcfg -v -u dni_dne
