The touchpad is an inbuilt pointing device of a laptop basically used to interact with the operating system (to move the mouse pointer). Sometimes we use an external mouse as well to make it more convenient. In this case, both mouse pointing devices will work simultaneously, which means you can use your mouse and touchpad to move the mouse pointer at the same time.
I have encountered a problem with the touchpad many times, and I am going to share it with you here. Not sure if others might encounter the same issue or not as mine. While typing on my laptop, sometimes our hands / palm get over / touch the touch-pad by mistake and the mouse pointer moves and clicks unwantedly. Your typing might have gone to the wrong place. This is very irritating and annoying for me every time this happens to me. My initial thought is, what if I had an option to disable the touch-pad in Windows 11 on my laptop for the time being or while typing?
Fortunately, Windows 11 has an option to disable the touch-pad. I am going to share a step-by-step guide on how you can disable the touchpad in Windows 11. I will also share the steps on how to re-enable it later on.
After knowing this option, I can easily disable my laptop touchpad HP/Dell/Asus/Lenovo/Acer using a keyboard shortcut. It is really such a relief for me. Now I can type flawlessly. So, let’s learn how to Enable or Disable Touchpad on your Windows 11 laptop.
How to Disable Touchpad on HP/Dell/Asus Laptop
There are two methods to disable the touchpad in Windows 11 / 10 using its shortcut keys or de-activate it from Windows 11 settings. Explore both the methods below.
Disable Touchpad using Keyboard Shortcut
This method is extremely simple to deactivate the touchpad on any laptop and any Windows edition (versions) like Windows 11/10/8/8.1/7 because it is a manual method. Follow these steps:
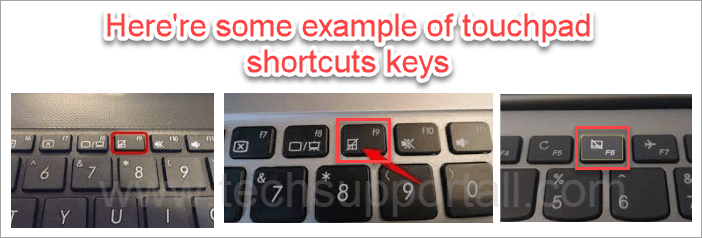
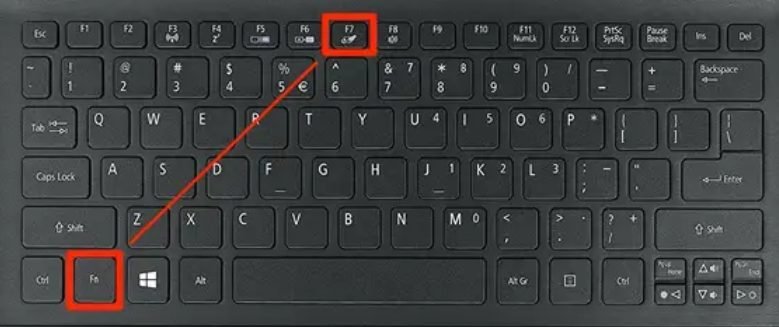
- Simply look at your laptop’s keyboard and you’ll see function keys (F1, F2, F3) on the top. In the function key’s bay, you’ll see a touchpad icon printed on one of the function keys along with function numbers.

- Once you identify the that key, just press the touchpad function key along with the FN key which is located near the spacebar. See the picture below.
Disable Touchpad using Windows 11 settings
Step 1: Press the Win+I combination to go to Windows Settings. Once you’re there, click on Bluetooth & Devices.
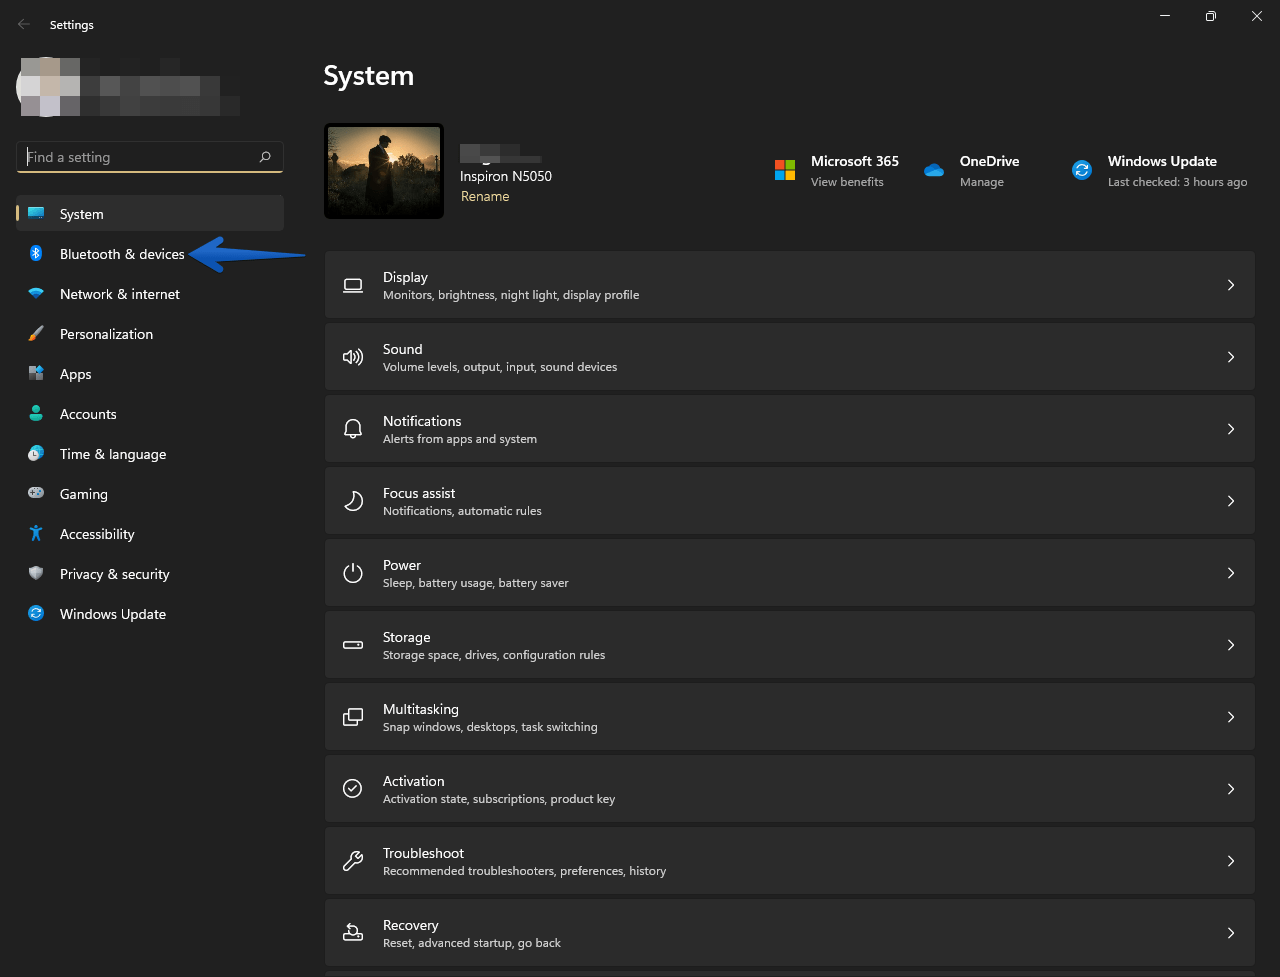
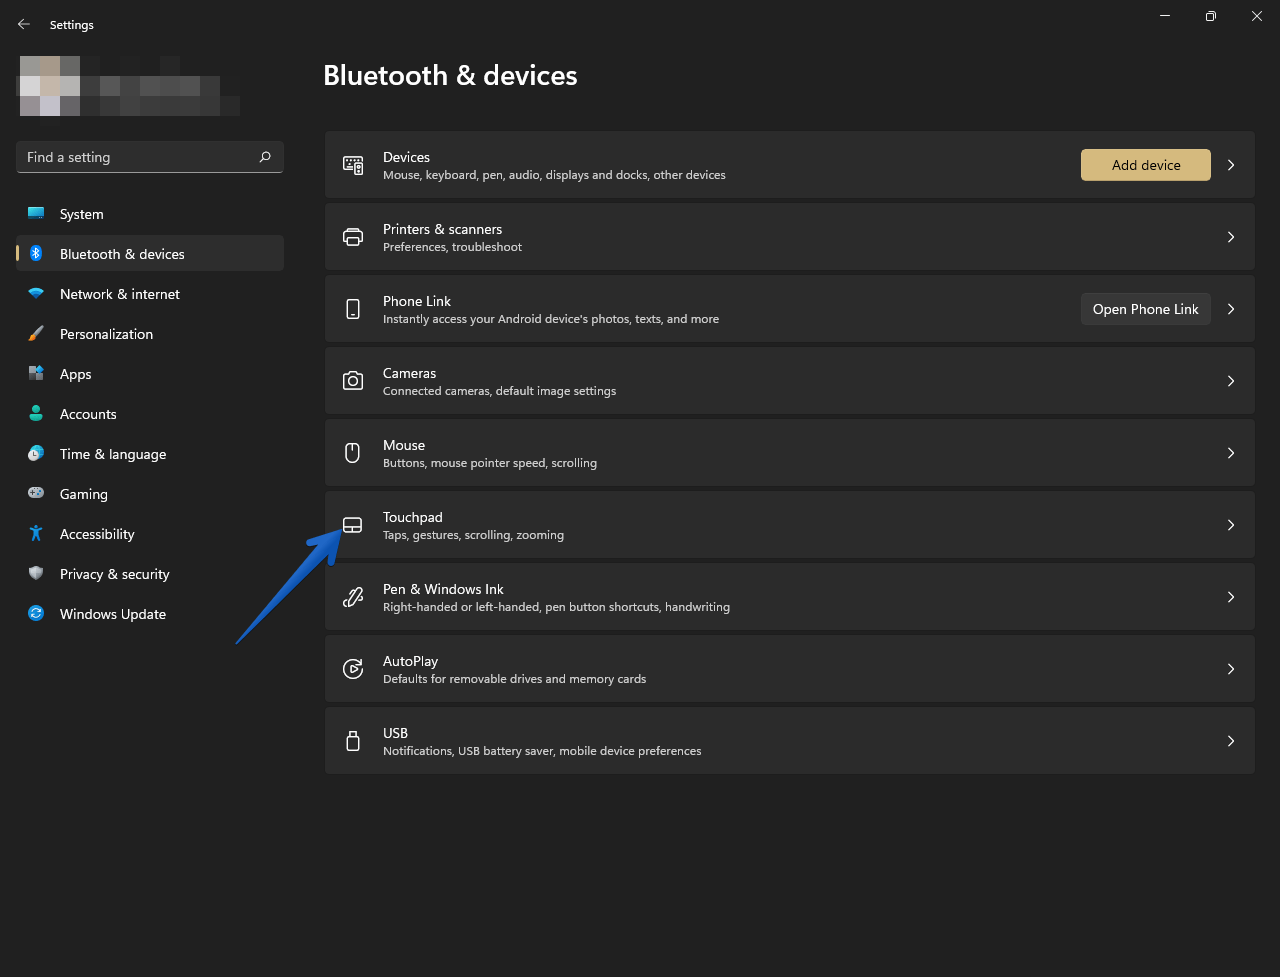
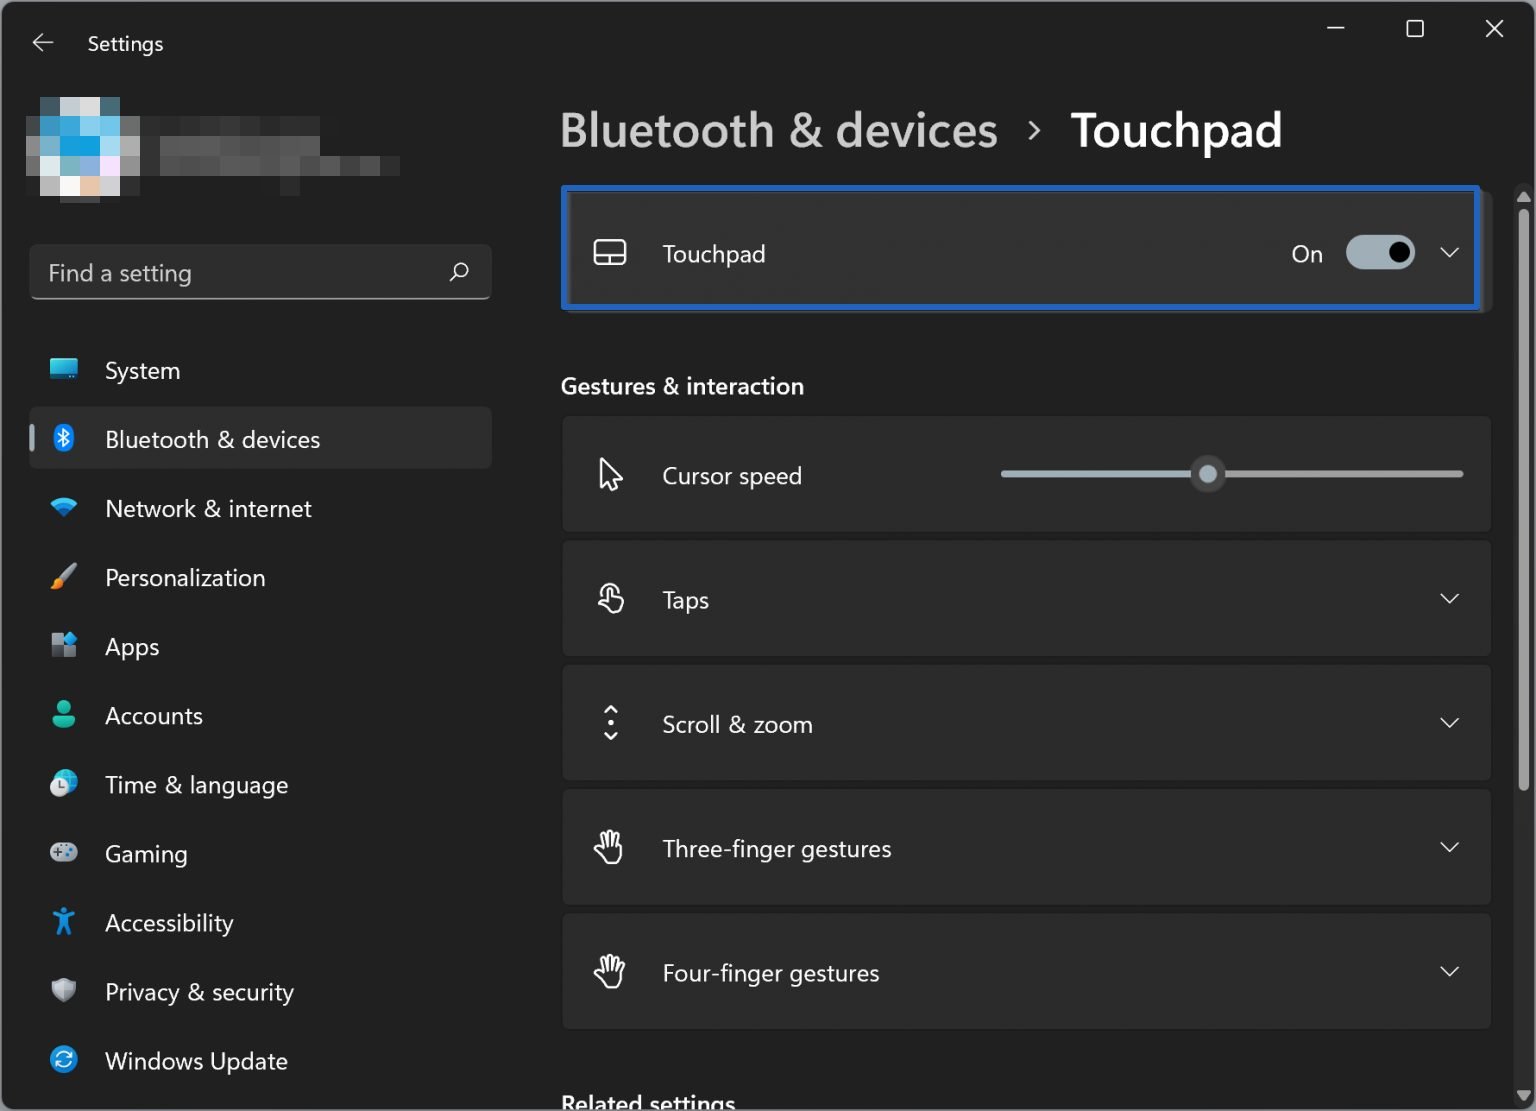
Step 3: In sequence, all the options related to the Touchpad are displayed. However, what we are interested in is the switch next to Touchpad. By default, it is enabled. Consequently, just move the switch to the Off position to turn it off.
Disable Touchpad using Windows 10 Settings
It is certainly possible to disable the touchpad from the Hardware option. However, Windows offers this possibility in a simpler way.
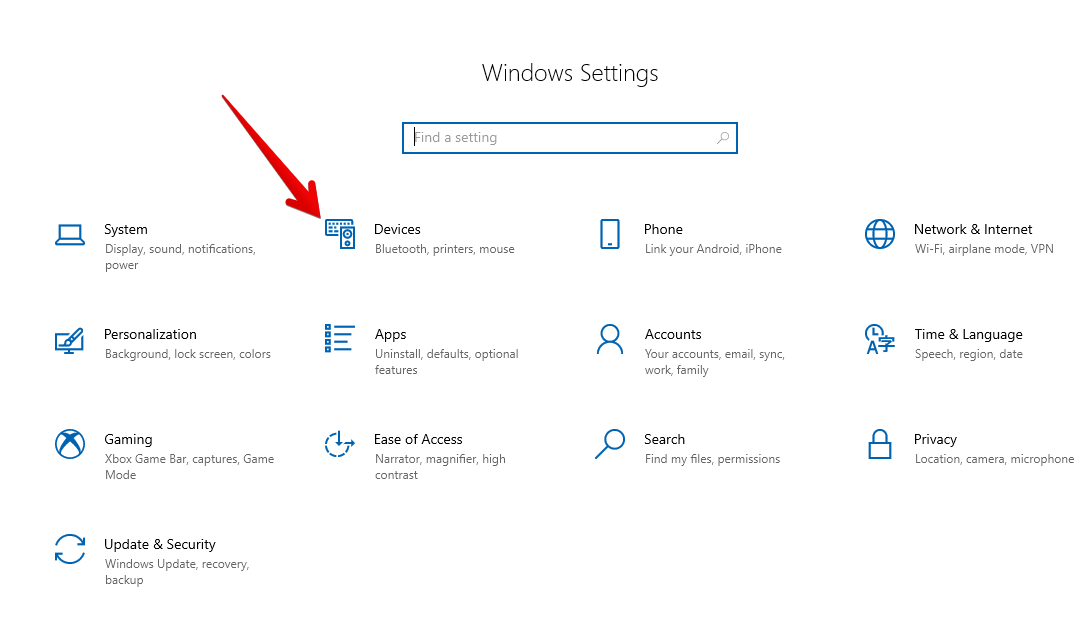
- Go to Windows Settings – press the Win+I combination. Once you’re there, click on Devices.

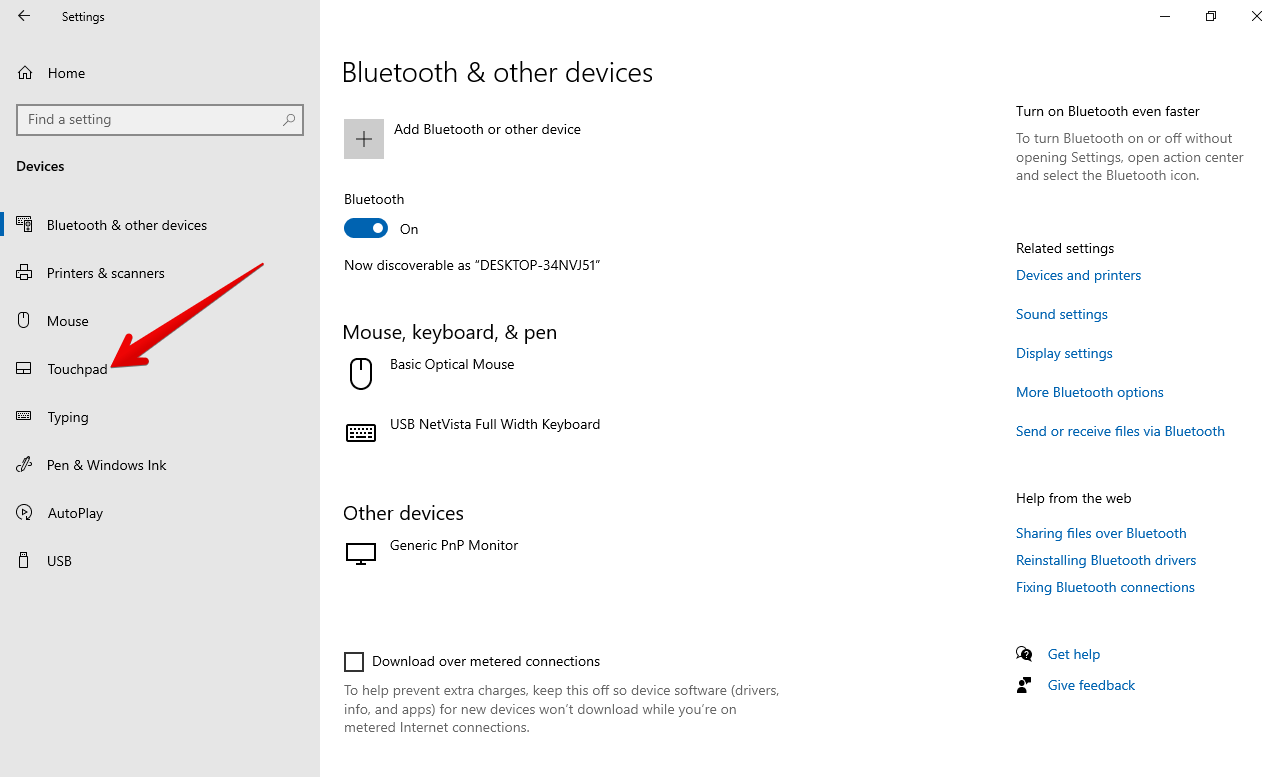
- Next, scroll down to the bottom until you click on Touchpad from the left side pane.

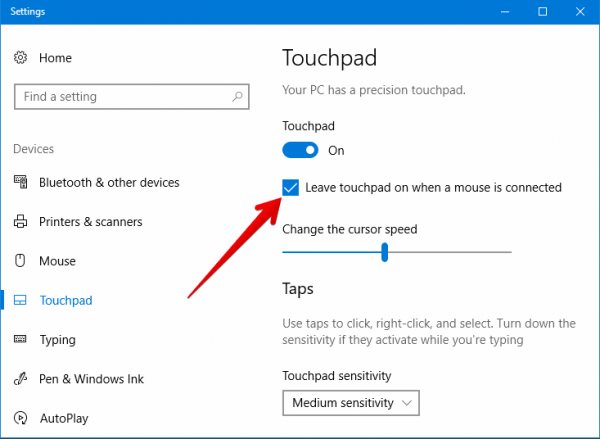
- You will immediately see a switch under the word Touchpad. In fact, you just need to deactivate the switch. As a result, this device will be disabled. Please note that this option will only appear if you have a device with Touchpad. If you are using a desktop computer with a peripheral mouse, then the option will not be available.

- However, Windows presents another option. If you check the box below, then the system will leave the touchpad active. However, if you connect a mouse, then it will stop working. So there is no interference. On the other hand, if you unplug the mouse, then the touchpad will start working again.

- That’s it. Your laptop’s pointer touchpad should be disabled.
Disable Touchpad through Device Manager
- Simply open the device manager by searching for it on the search bar.
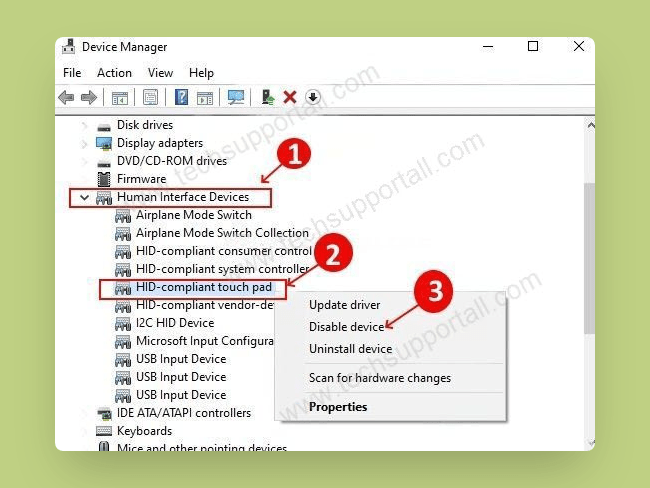
- Under Device Manager, expand the “Human Interface Devices” by clicking on its front arrow. Look for your touchpad device there.
- After that, right click on the touchpad (HID-complaint touchpad) and click on “Disable device”

Enable Touchpad
To enable the touchpad in Windows 11 you just need to go to the same settings and then turn on the touchpad toggle switch.
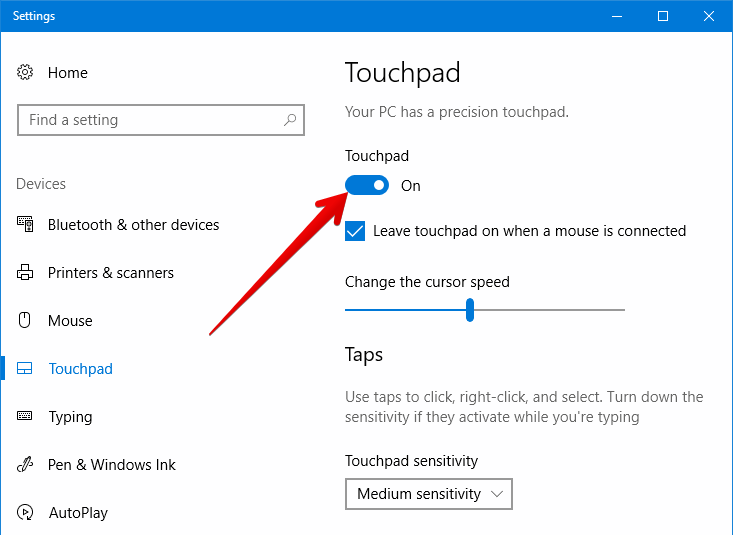
This way we can see how to disable the touchpad on a laptop in Windows 10. Please stay tuned to our updates for more tutorials on Windows 10.
