There are some temp folders in Windows which hold the files for temporary use. Over the time these could take a lot of space and may slow down the PC performance. So time to time we require to delete unnecessary files from the system. Let’s see what are the temporary files, and how to delete temp files in Windows 10.
What is Temp file?
As the name (Temp) tells the story; temp files are Temporary files created by either an installer or application / services for temporary use. Once the application or installer closes, these temp files become useless. Because these temp files are associated for the particular session only. Once you open the application again, it will create new files for that session. So we can say, we should clean the temp files regularly to keep our computer clean.
Where are the temp files located?
In Windows 10 temp folder is located at 2 places. One for all users and one is user specific. Windows update keeps its files at different location. And there is another folder named as Prefetch. Below table will show the path of the each folder. Location are related to Windows installed in C drive. If you have installed Windows in different drive change the drive accordingly.
Temp folder Locations:
| Description | Location | Commands |
| Temp folder location for current user only | C:\Users\<user profile>\AppData\Local\Temp | %temp% |
| Temp folder location for all users | C:\Windows\Temp | temp |
| Prefetch folder location | C:\Windows\Prefetch | prefetch |
| Windows update temp files | C:\Windows\SoftwareDistribution\Download | No command |
Various methods to delete Temp Files in Windows
- How to delete temp files through Windows 10 settings
- How to delete temp files using disk cleanup utility
- How to delete temp files manually
- How to Remove prefetch temp files manually
- How to delete Windows update temporary downloaded files
1. Delete Temporary Files through Windows 10 Settings
The first method is to delete temporary files using inbuilt windows 10 settings. Let’s see how to do it?
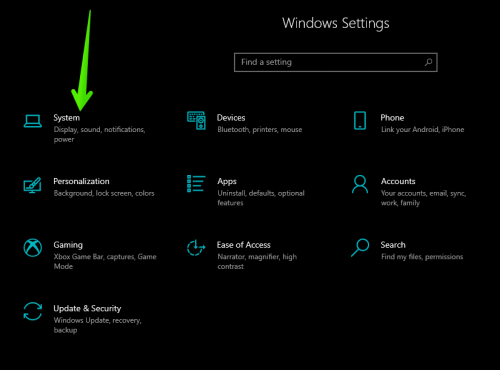
- With this in mind, press the Win+I combination. Once you’re there, click on System.

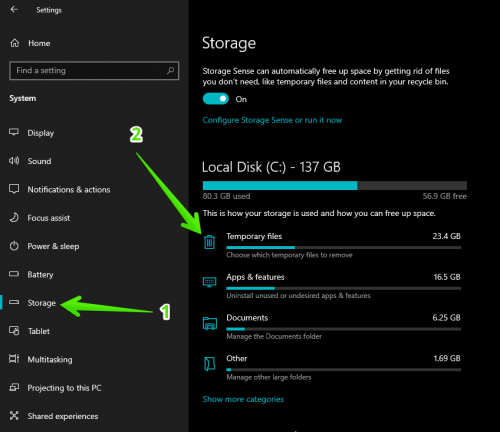
- Then, you must click on Storage. Immediately, the partition where the system is installed will be displayed. In addition, you will see several other options. However, the one we are interested in is the one related to temporary files. Therefore, click on ‘Temporary Files’.

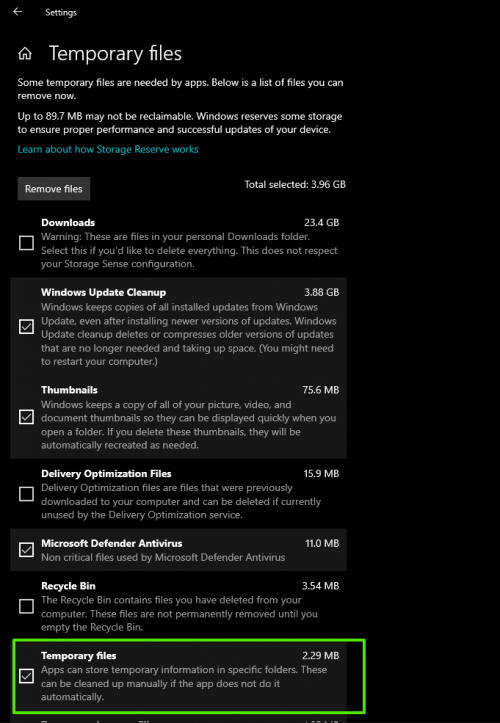
- Then the wizard will start scanning the storage for temporary files. This process may take a few minutes, depending on system congestion. Well, below is a list with various types of files. Consequently, select the one corresponding to the temporary files and click on Remove files.

2. Delete Temp Files Using Disk Cleaner
Microsoft’s own system has a simple utility that allows us to get rid of temporary files stored on the computer using Windows built-in cleanup utility. To do this, follow the following steps:
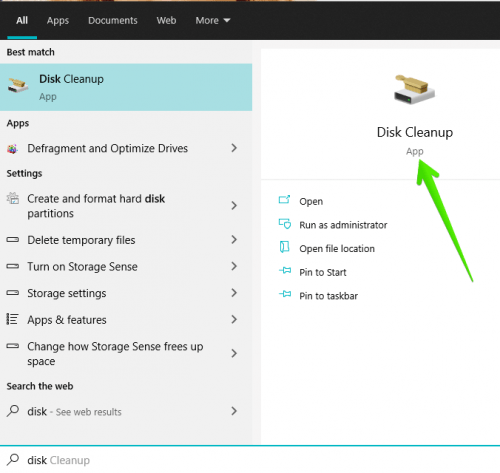
- Press the combination Win+Q and type Disk Cleanup in the search bar.

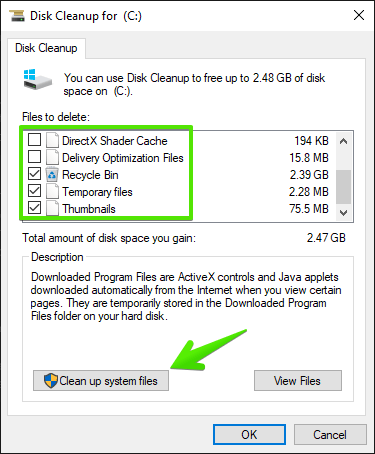
- The wizard will then determine the amount of space that can be released. In addition, a list of files is displayed. Therefore, you only have to select those you want to delete by checking the corresponding box. Finally, click on Clean up system files.

3. Delete temp files manually
There is another direct option to delete temp files which is manual removal of temp files.
It is to open the Windows File Explorer and access the folder C:\Windows\Temp and C:\Users\<user profile name>\AppData\Local\Temp. Consequently, we will be able to delete them manually in a more direct way. However, the user must have administrator privileges. This is logical, since temporary files will be deleted from all users.
To remove the temp file manually, follow the following instructions:
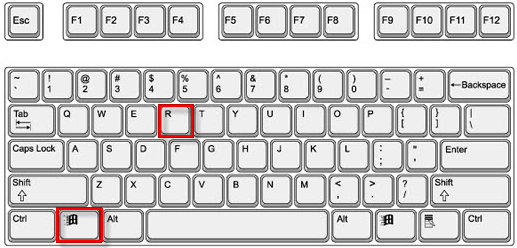
- Press Windows + R key from your keyboard. It will open up the run box.

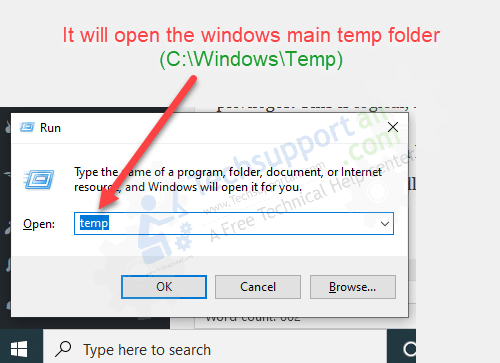
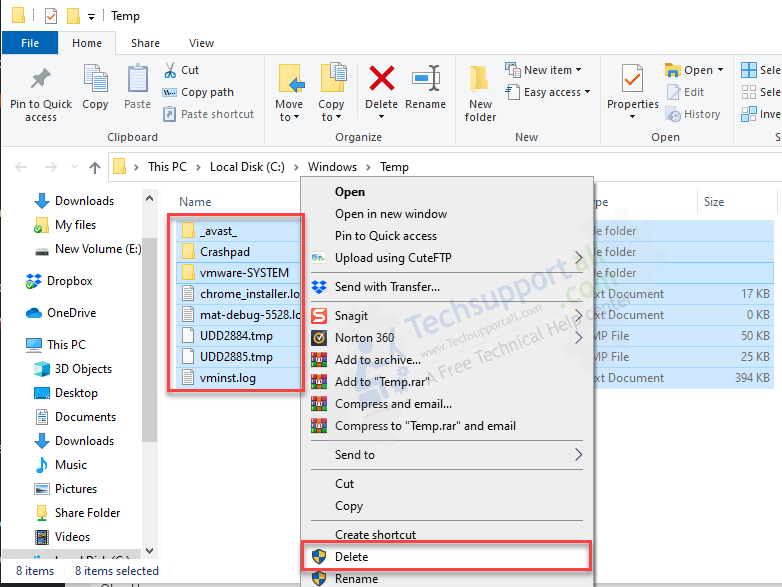
- Type temp in the run box and click on OK. This will open up the windows main temp folder.

- Once you are there (C:\Windows\Temp), delete all the files from there.

- Then close this window.
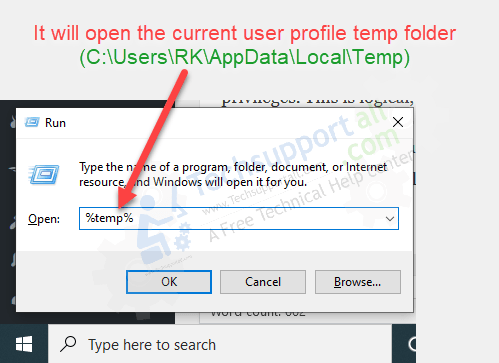
- Press Windows + R key again from your keyboard to open up the run box.

- Now type %temp% to open up the current user profile temp folder.

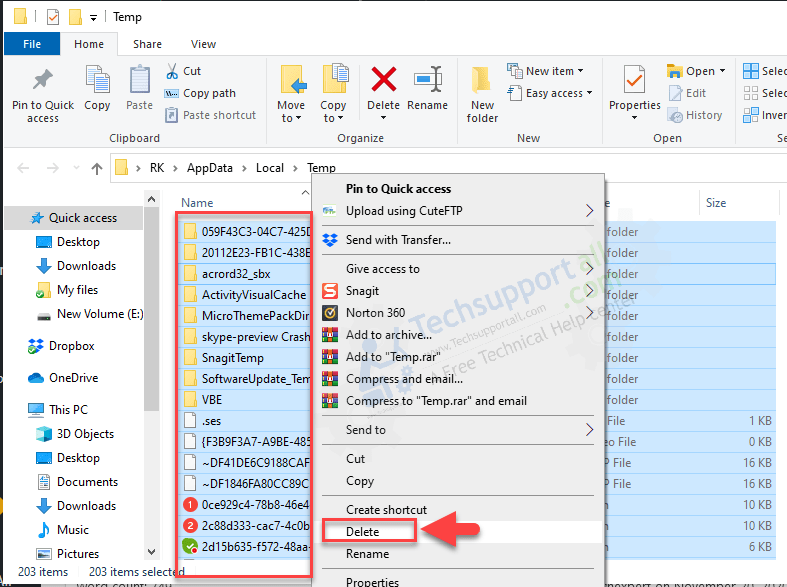
- Once you are there (C:\Users\<user profile name>\AppData\Local\Temp), delete all the files from there.

- That’s it.
How to delete Prefetch TEMP files?
What is Prefetch: Whenever an application is executed on a computer, the Windows operating system generates Prefetch file that includes information on the files loaded by your application. Prefetch file information is used to reduce the program loading time the next time you run it. Seems like a browser cache. Eventually, we should remove them so that it can be recreated automatically, so that it can enhance your computer performance.
To remove prefetch files, follow the following instructions:
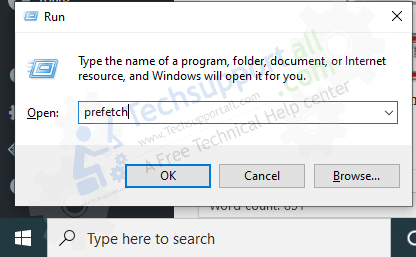
- Press Windows + R key from your keyboard. It will open up the run box.

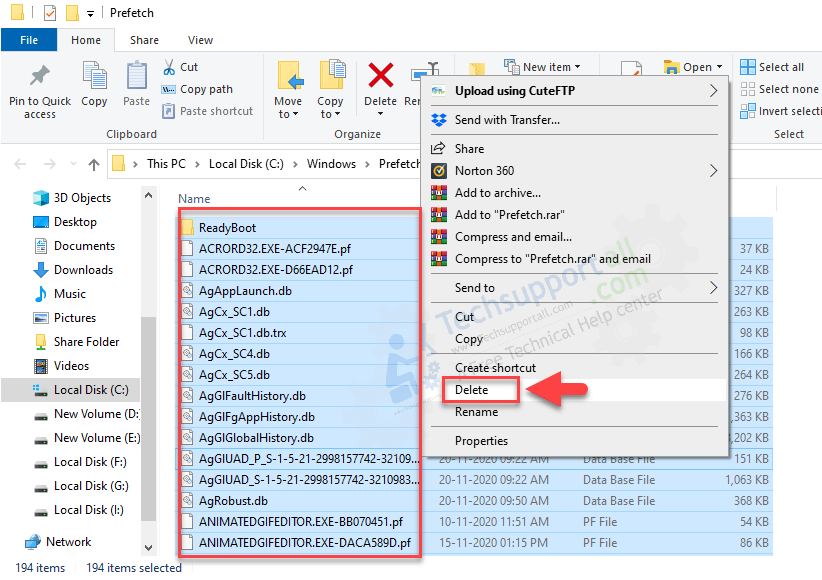
- Type prefetch in the run box and click on OK. It will open up this location: C:\Windows\Prefetch or you may go to the following location directly from Windows Explorer.

- Once you are there (C:\Windows\Prefetch). Select all the files by pressing Ctrl + A keys together and delete them.

- That’s it.
How to delete Windows Update Temp files
As we know Windows-Update downloads lots of files into the computer and then installs them one by one.
Do you know what happens after successfully installing the windows updates? Are these downloaded files deleted automatically or are they still stored on the computer? Yes, all the files are still stored on the computer as temporary files.
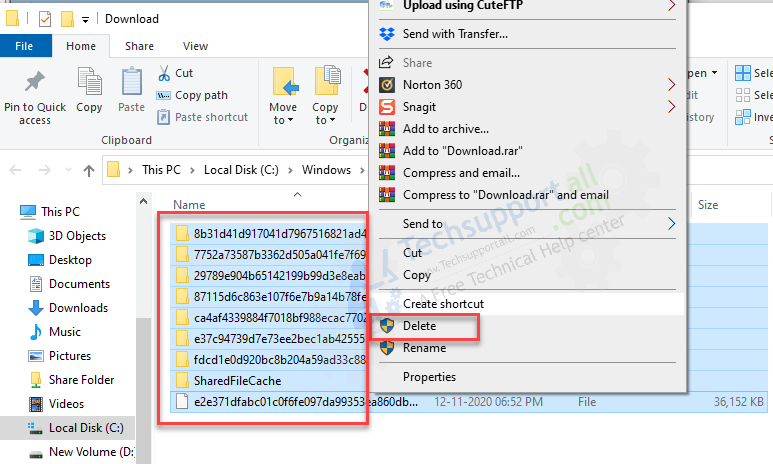
So come to the main point, we should delete these Windows update temporary files as well. The Windows update temporary files are stored in (C:\Windows\SoftwareDistribution\Download
) in this folder is is auto generated folder by windows update service. if you delete this folder it will be auto generated once the computer restarted Windows try to download the latest update.
So let’s check how to delete the windows and update temporary files.
- Open the services page.
- Stop the Windows update service.
- Open ThisPC and navigate the following location:
C:\Windows\SoftwareDistribution\Download
- Delete all the files and folders in the download folder.

- That’s it.
Alright, we have seen 5 methods to remove temporary files (temp files) in Windows 10. We definitely recommend doing this on a regular basis. But these days this can be done automatically by using system optimizer or system cleaner software. These days even some antivirus software also provide functionality to regularly run the system cleanup utility.
You have given good article. Another option is an mac uninstaller, just download and delete all unnecessary files and folders.