Does Windows 11 prohibit changing the time zone or manually setting the date and time? This occurs as a result of the automated selection based on the selected regional settings. Find out how to change the time zone, date and time, and regional settings in Windows to fix the problem.
In addition, we will describe how to manually set the custom time. Because by default Windows automatically sync time from server over the internet. We just have to select the right time zone for our region. Without going deep lets first find out how we can set the time zone.
How to change the time zone in Windows 11
Although we set the time zone while installing Windows, if you want to change it thereafter, then follow the steps below.
Step 1
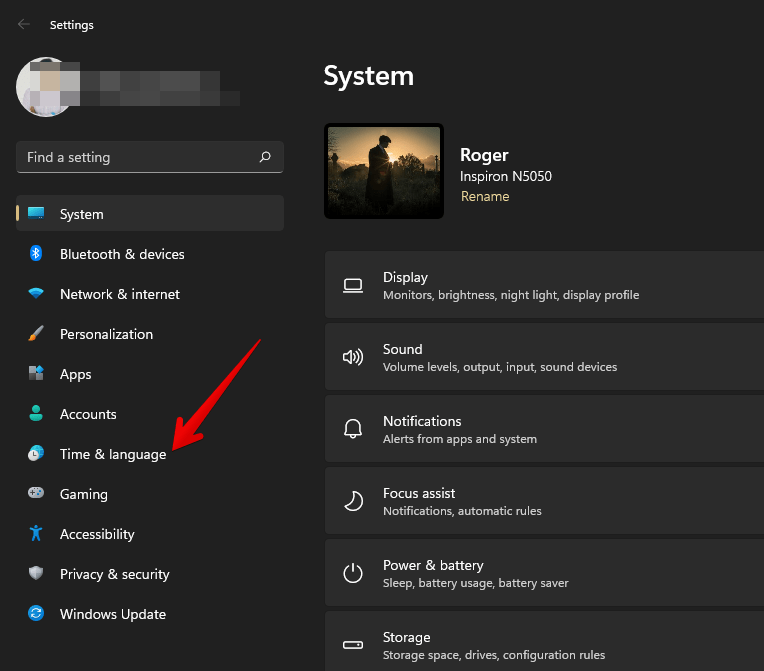
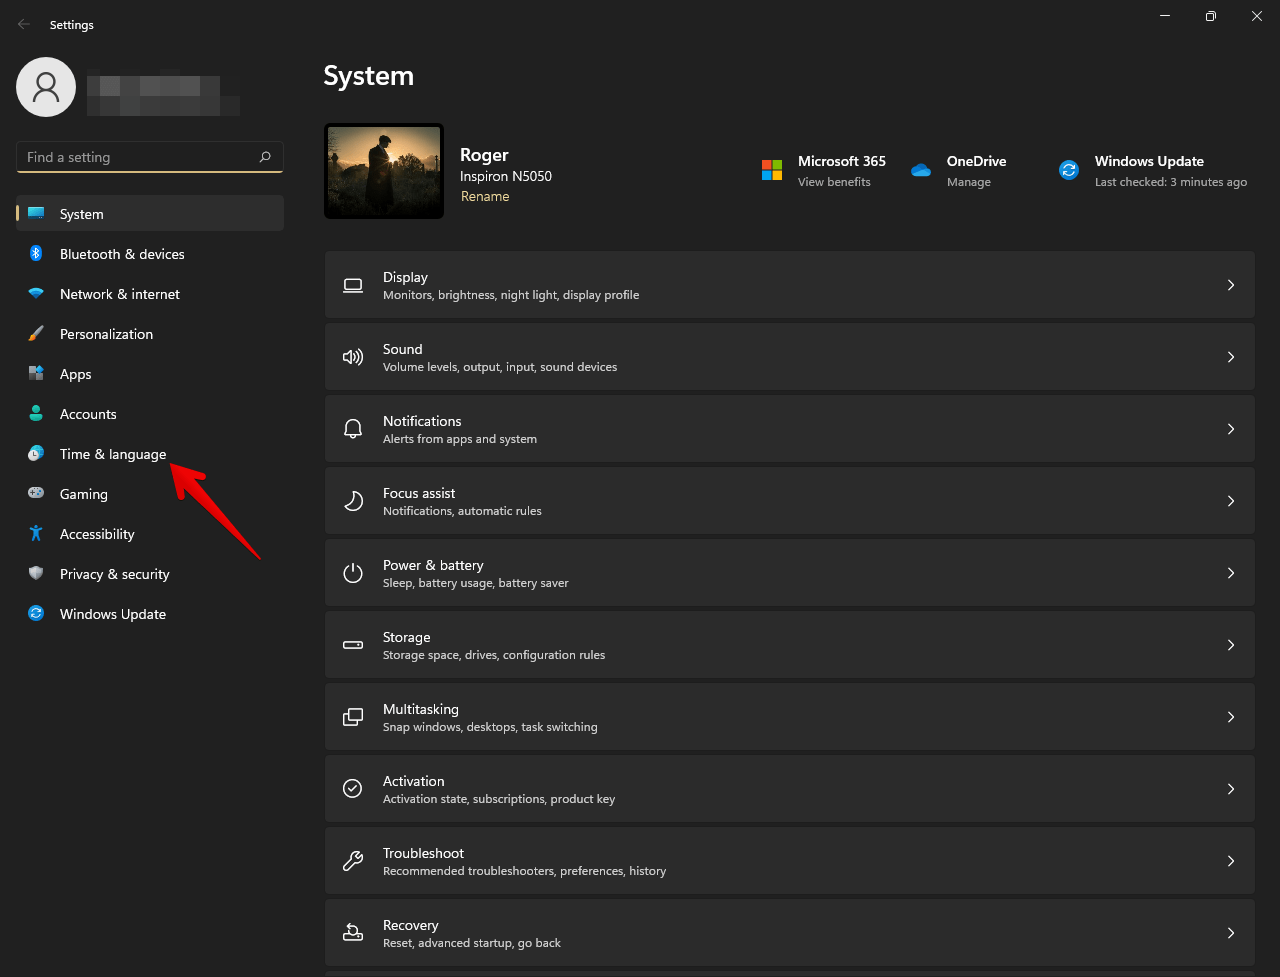
Press Win + I to open Windows Settings. Once you’re there, click on Time & Language.
Step 2
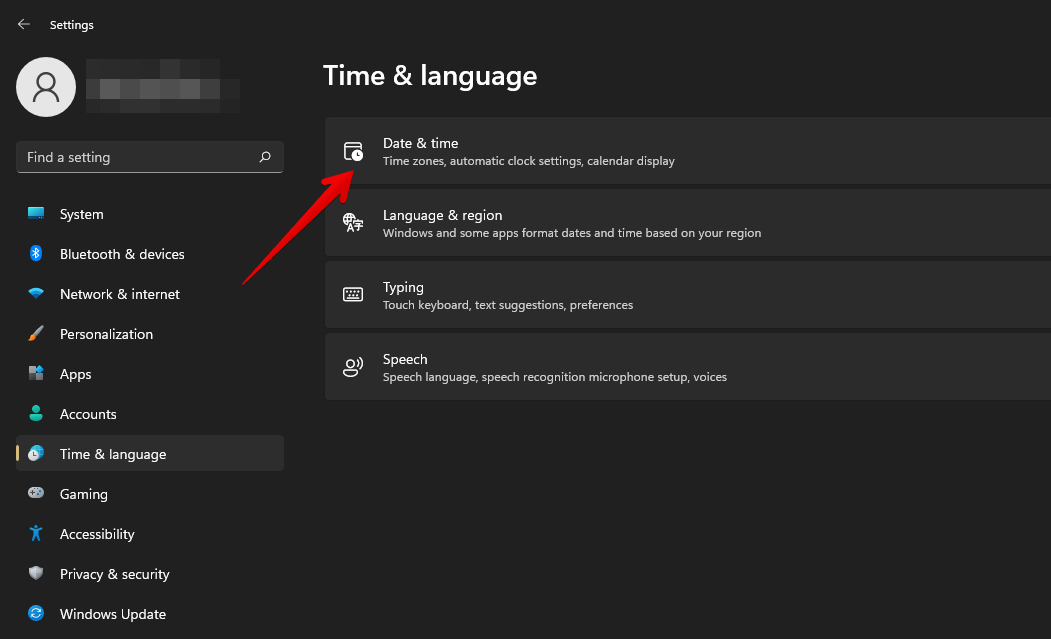
Now, in the right column, please click on Date & Time.
Step 3
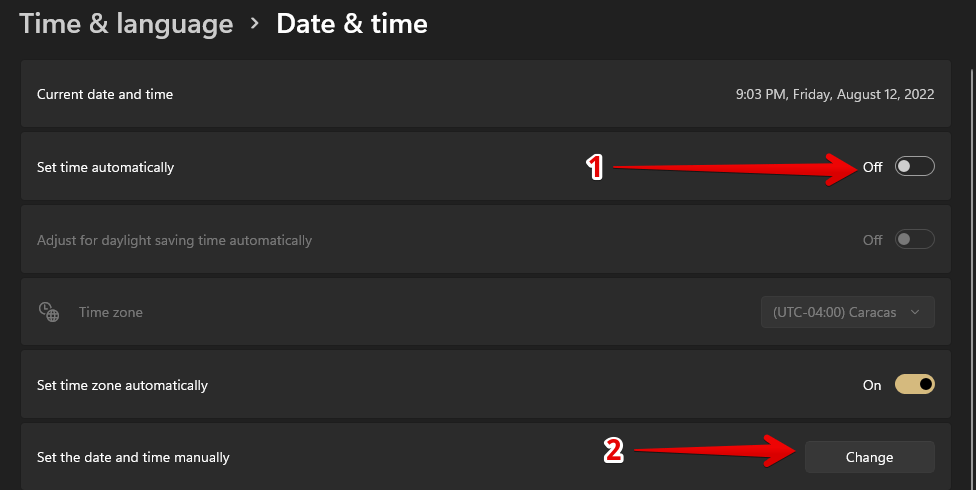
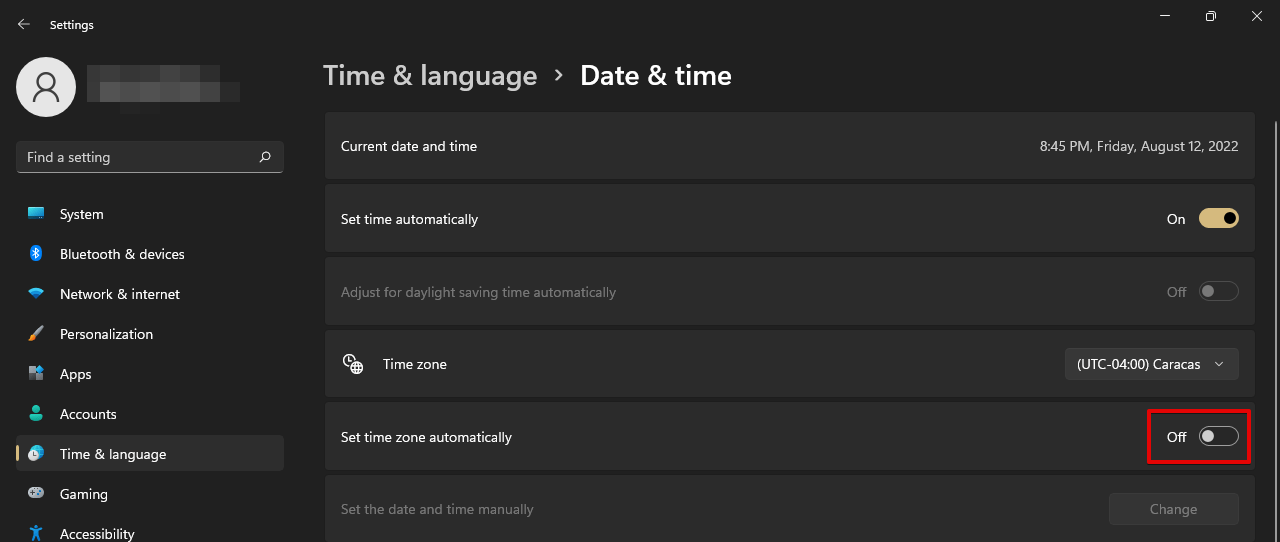
By default Windows automatically pick up the time zone according to regional settings chosen by the user while installing Windows. So here either you have to change the region settings or if you want keep the region settings but change the time zone then turn off the automatic time zone selection.
- Turn off the “set time zone automatically” settings.
Step 4
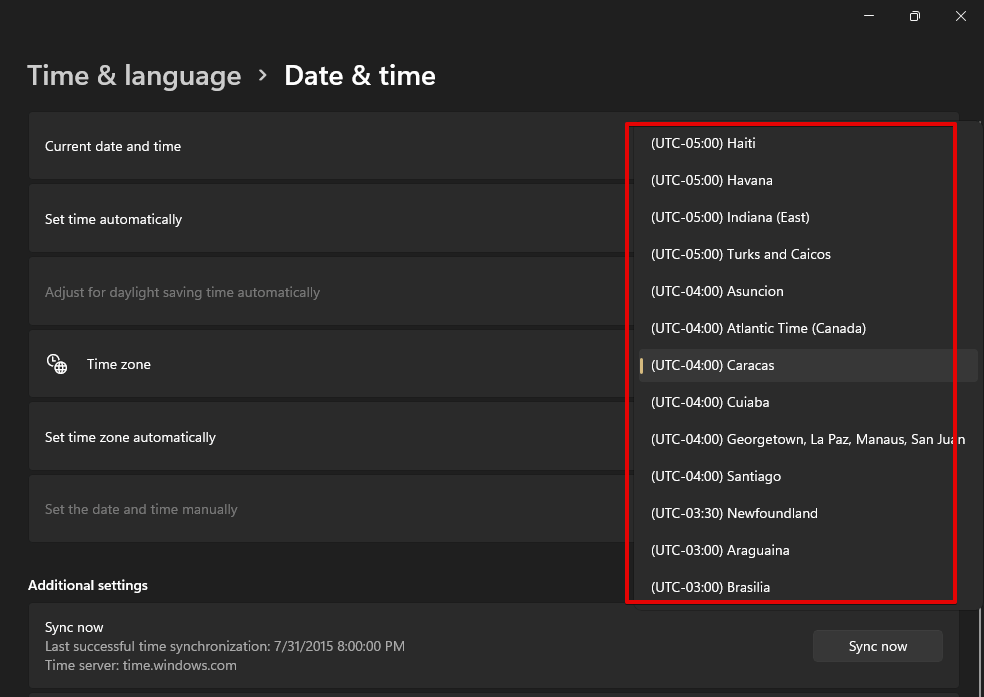
Now in front of the Time zone click on its drop-down menu and choose your desired Time Zone.
Step 5
Now to sync the time according to your chosen time zone sync it with the server. Scroll down to Additional settings and press the Sync now button.
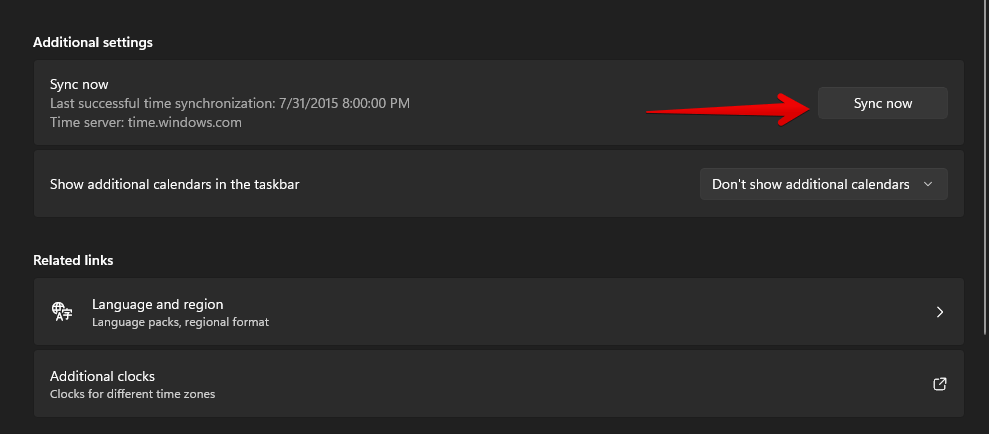
Check the current time at the bottom right of your desktop. This should match your regional time now.
How to manually set the date and time in Windows 11
If for some reason the displayed time is still incorrect, you can also manually change the Date and Time manually. To accomplish this, follow these simple steps:
- First, disable the toggle switch to Set time automatically. Otherwise, the setting to manually Change date & time remains grayed out. After disabling the automatic time settings, click the Set the date and time manually button.

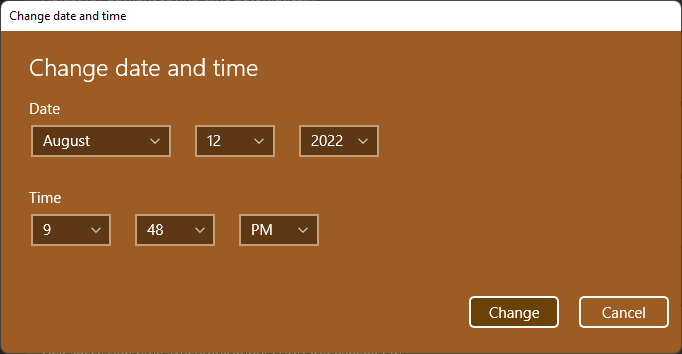
- Consequently, a new window is displayed where you have to manually enter the new time values.

Though we recommend you to sync the time over server by selecting the right time zone or region. Let’s find out how we can change or set the preferred region.
How can I change the region in Windows 11?
When setting up a Windows PC for the first time, many users neglect to change the default location. Subsequently, they become aware of this problem and want to correct it. If so, follow the steps below to change the regional settings:
- Press the Win +I combination to go to Windows Settings. Once there, click on Time & Language.

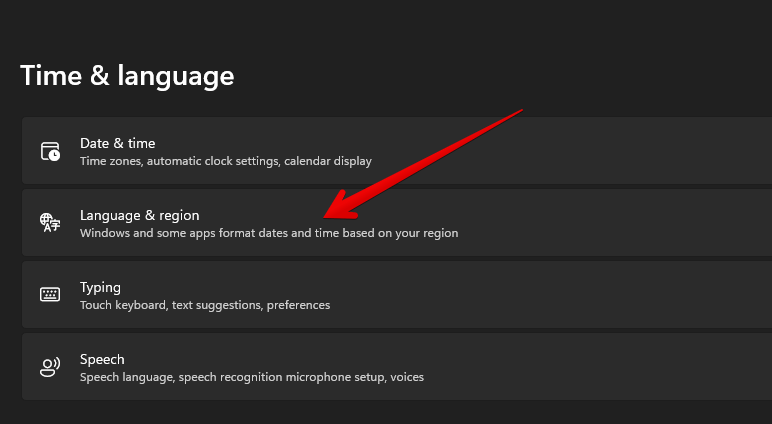
- Now click on Language & region.

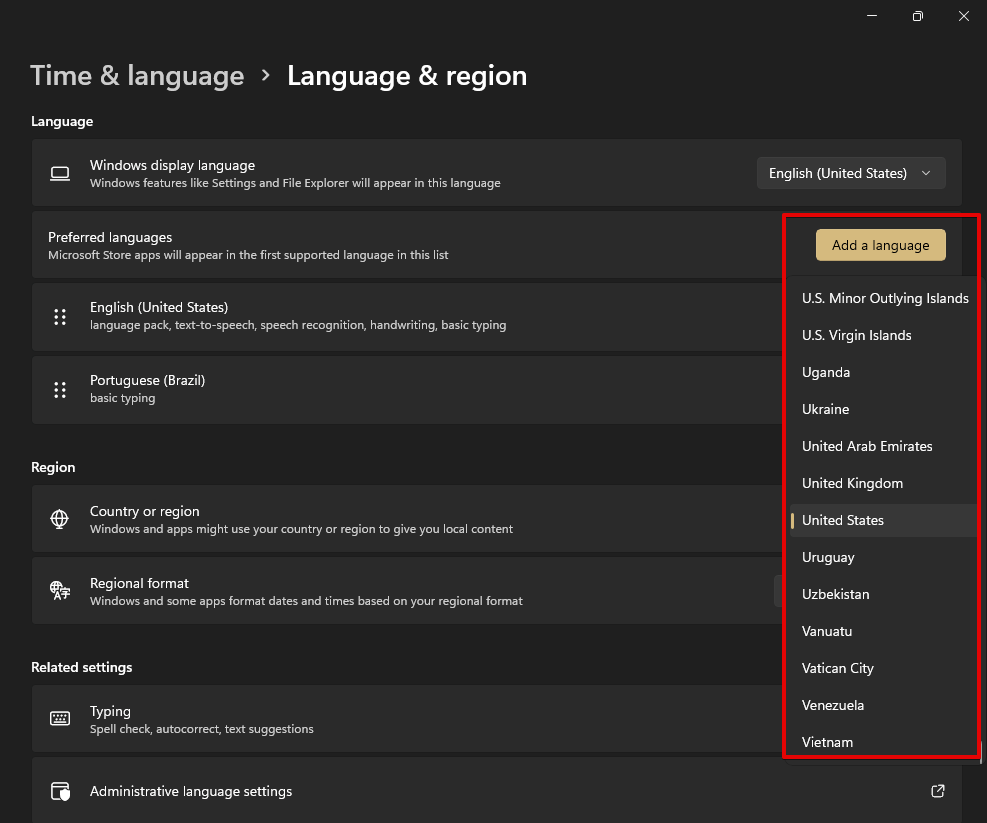
- Scroll down to the Region. Now use the drop-down menu available next to it and select your country.


- Change the country by clicking on drop down.

OK, ultimately, we have learned how to change the time zone, date and time, regional settings in Windows 11. This can be a real headache if not configured correctly.
Why we need to change the time zone in Windows
When we install or configure Windows, it prompts us for regional settings. In accordance with this, the time zone is automatically determined based on the selected region. In the future, you will need to alter the time zone for a variety of reasons, such as relocating to a new location or traveling to a different time zone. You want to preserve your regional settings, but you want to alter the time zone to one that is not associated with your location.
