The problem as reported on various Windows 7 machines doesn’t allow users to shutdown their computer. When the users try to shutdown their PC they get an error message stating “You don’t have permission to shut down this computer”. As mentioned before, Microsoft has stopped providing support for Windows 7, and they have yet to comment on this fresh bug.
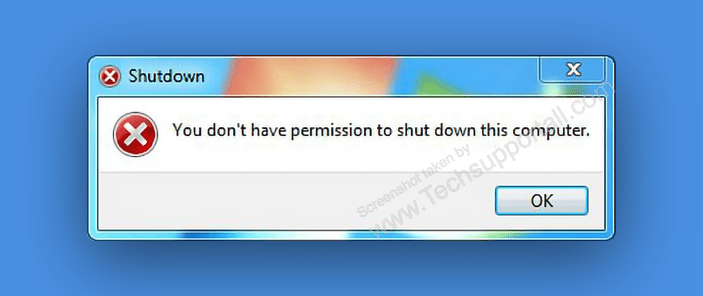
Error message:
You don’t have permission to shutdown this computer
The actual cause of this problem is still unknown, but users have unofficially found some methods which are effective in resolving this problem. These solutions were shared on some online forums, We are sharing solution that will allow other infected users to at least shutdown their computer until Microsoft comes up with some official solution to this problem.
Steps to Fix “You don’t have permission to shutdown this computer”
Follow the following steps to fix this issue. There are two ways to fix it. Although this step is for Windows 7 computer as Windows 7 update having this bug, you can try the same method in Windows 10, Windows 8, or Windows 8.1 operating system.
First Method
This method is suitable for users who can follow certain complex steps. Here, we will try to make these steps as easy to execute as possible by providing simple step-by-step instructions. In this method, you will have to make changes in the system-level settings and any mistake can create some other problems on your computer.
So follow the steps given below cautiously.
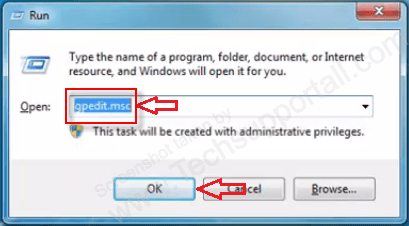
- Press ‘Win + R’ keys together to open Windows Run program. In this window type ‘gpedit.msc’ and then click on ‘OK‘.

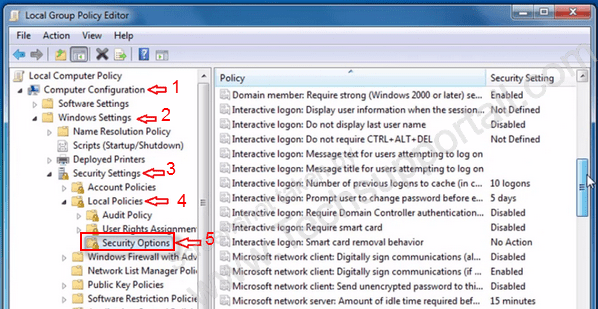
This will open ‘Local Group Policy Editor’ window. For novice users we would like to inform that Local Group Policy Editor is used to set permissions on a Windows 7 computer. Therefore, any mistake in executing subsequent commands can adversely affect your Windows user experience. Follow, the steps given below carefully. - In the left side panel of the Local Group Policy Editor, go to Computer Configuration → Windows Settings → Security Settings → Local Policies → Security Options.

- Now, in the right panel, locate and double click “User Account Control: Run all administrators in Admin Approval Mode”.

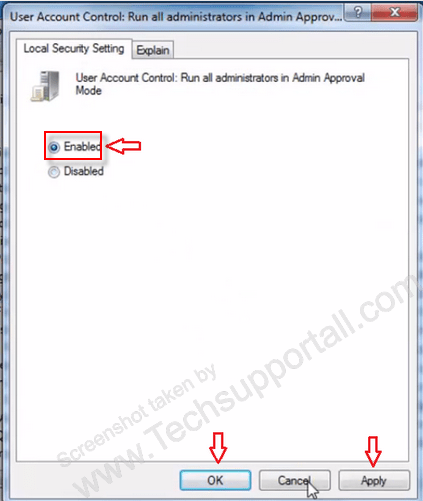
- This will open User Account Control window of this option. Select ‘Enabled’, click ‘OK‘. If it is already ‘Enabled’, then also click once on ‘Disabled’, click again on ‘Enabled’, now click ‘Apply’ and then click ‘OK’.

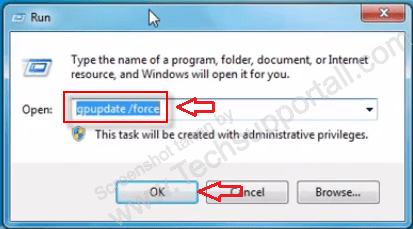
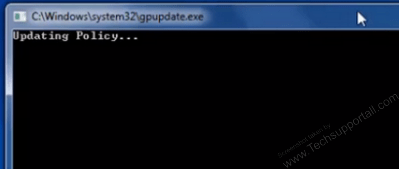
- Now, press ‘Win + R’ keys together to open the Windows Run program and type ‘gpupdate /force’. Click ‘OK’.

- Now a new window will open displaying ‘Updating Policy…’. This means all the recent policies that you have changed on your computer are being updated. Wait for this to complete.

- Now you will be able to restart or shutdown your computer just as normal. However, if you still encounter some problem, then follow the above steps exactly as they have been mentioned.
Second Method
This solution was shared by a user on Reddit as a temporary way out of his problem. The most impressive feature of this method is that it can be done by even a novice Windows 7 user as it doesn’t require you to follow any complicated steps. Follow the steps given below to execute this method.
- Create an admin account unless you already have one. Follow the steps given below to create another admin account.
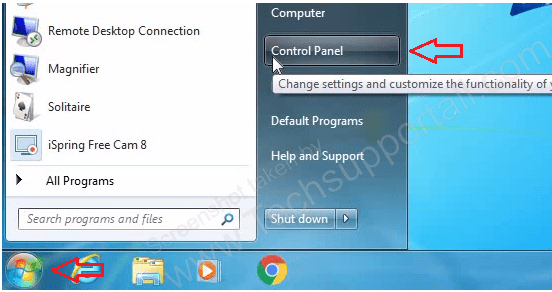
- Click on ‘Start’ button and go to ‘Control Panel’.

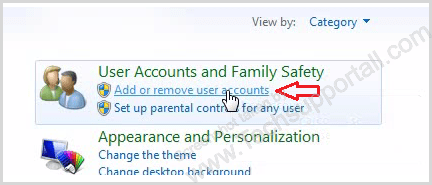
- Click on ‘Add or remove user accounts’.

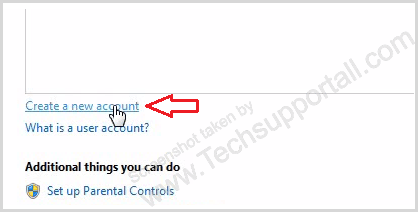
- Click on ‘Create a new account’.

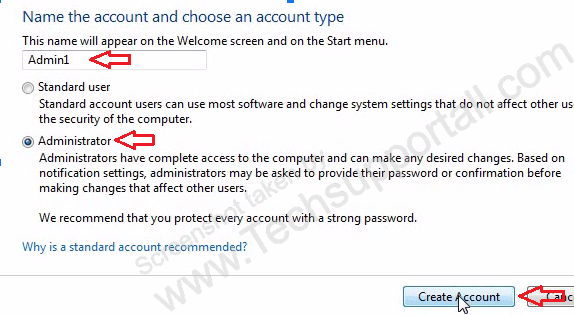
- Write the name of the user in the box, in this case, ‘Admin1’, select ‘Administrator’ option and click ‘Create Account’.

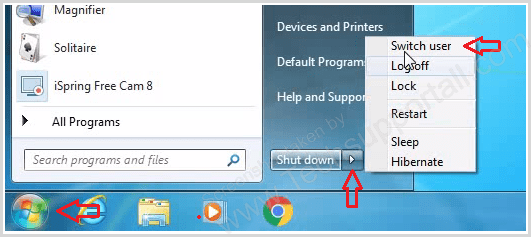
- Now click on ‘Start’ button. Next click on the arrow in front of ‘Shut down’ and select ‘Switch user’.

- In the next screen, you will be told to choose between users. Select the username of your other admin account. In this case, the account you had created in the previous step, which is ‘Admin1’.
- Once you login as ‘Admin1’, follow the steps 2 and 3 to re-login into your default user account.
- Now you will be able to Shutdown or reboot your computer just as normal.
- This solution does work for many users, but unfortunately, this method doesn’t solve the problem. This solution is like side-stepping the problem. Following these steps every time you want to restart your computer can be highly frustrating.Tip: One more suggestion given by some users is to hit ‘Crtl + Alt + Del’ keys together and then use the red button on the bottom-right corner of the screen to restart your computer. You can try this technique, it might just work for you.
Third Method
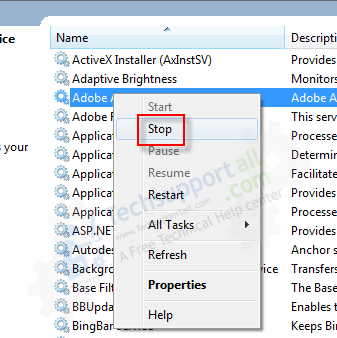
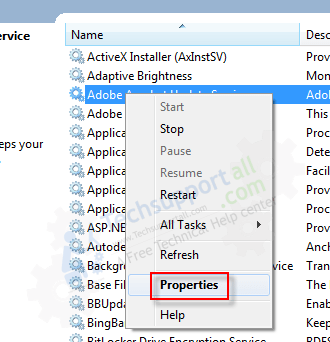
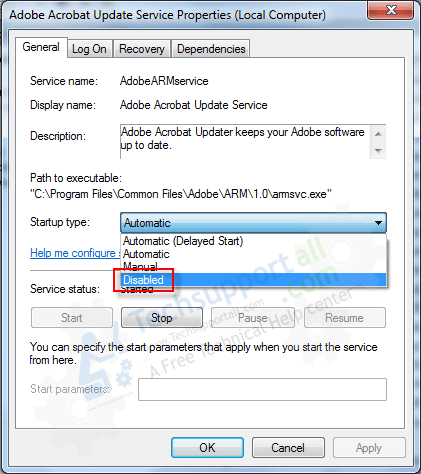
Stop or disable the Adobe update services. To do that, go to services page (services.msc) and then right-click on the following services and click on stop button on each.
- Adobe Genuine Monitor Service
- Adobe Genuine Software Integrity Service
- Adobe Update

And also disable the same services in the startup as well. Here’s how – see the screenshot.
Although, Microsoft has stopped providing support for Windows 7, but users are expecting that Microsoft will step-in to solve this issue. Until that happens to follow the methods given above to resolve this problem.
Since, January 14, 2020, Microsoft has decided to end official support for the Windows 7 OS. This means users can no longer expect updates and security fixes for bugs found in Win 7. However, many users who are still using Windows 7 are widely complaining in various online forums about a glitch, which some say is due to a virus infection.
