Today we’ll talk about a Windows inbuilt tool: Disk cleanup. This tool helps to remove junk files from our computer. Let’s see how it works.
What is Windows Disk Cleanup Utility?
Disk cleanup tool has been present since Windows XP, through Windows Vista, Windows 7 and Windows 8 , Windows 10, Microsoft Server 2000, 2003, 2008, 2012, 2016, 2019. But there are also third-party programs to clean up the junk files in the system. However, Windows 10, has its own tool for cleaning the hard drive. This is called Disk Cleanup and in this article, we are going to go deeper into its use. Windows disk cleanup is the utility to use whenever you want to defragment your hard drive. Disk Cleanup utility knows as cleanmgr.exe as well.
How the Windows Disk Cleanup utility works
As mentioned above, Windows 10 has its own tool to free up space on hard disks. This one’s called Disk Cleanup. This is a utility included since Windows XP to clean the hard disk of junk files. This utility works by analyzing the hard drive you want to clean and classifying the files to delete into various categories:
- Recycle Bin
- Remove unused apps and optional Windows components
- Setup log files
- Offline web pages (cached)
- Temporary Internet files
- Temporary Windows files
- Downloaded program files
- Windows component store
- Compression of old files
Well, here will learn how to open, use disk cleanup.
Step 1: How to open Windows Disk Cleanup
Here in the following steps, we’ll show you the steps on how to open disk cleanup in Windows 10, 7, 8, Server 2003, 2008, 2012, 2016, 2019 computer (All the Microsoft operating systems).
Apply the below-given option 1, 2, 3, or 4 as per your convenience.
Option 1: How to open disk cleanup from the start menu
Once you’ve defined what the tool is and how it works, let’s see how to use it in Windows 10. If we want to access this tool, you can type Disk Cleanup in the search bar.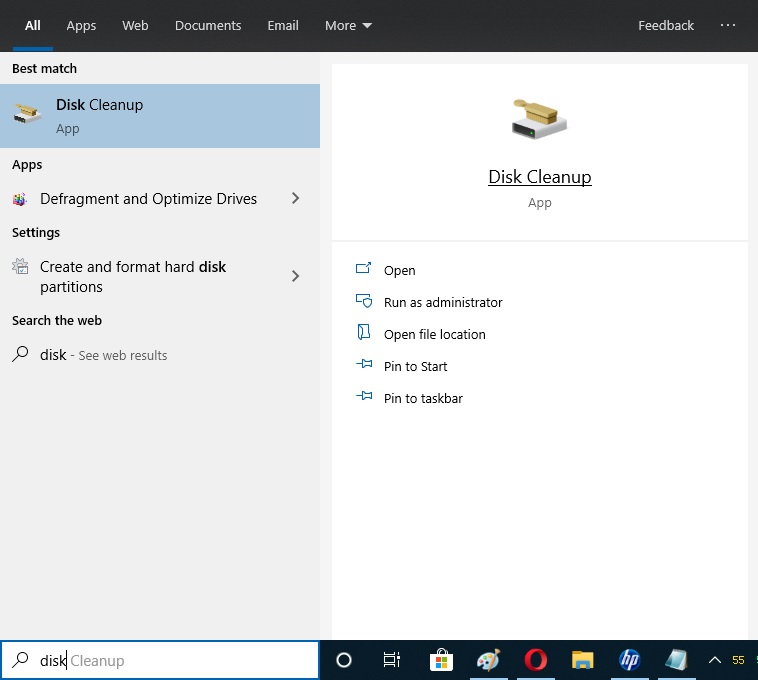
Option 2: Launch Disk Cleanup through file explorer.
It is possible to launch the cleanup disk from the file explorer. With this intention, go to it and select the disk drive you want to clean. It is possible to launch the cleanup disk from the file explorer. With this in mind, go to it and select the drive you want to clean. Right-click the mouse and enter the properties:
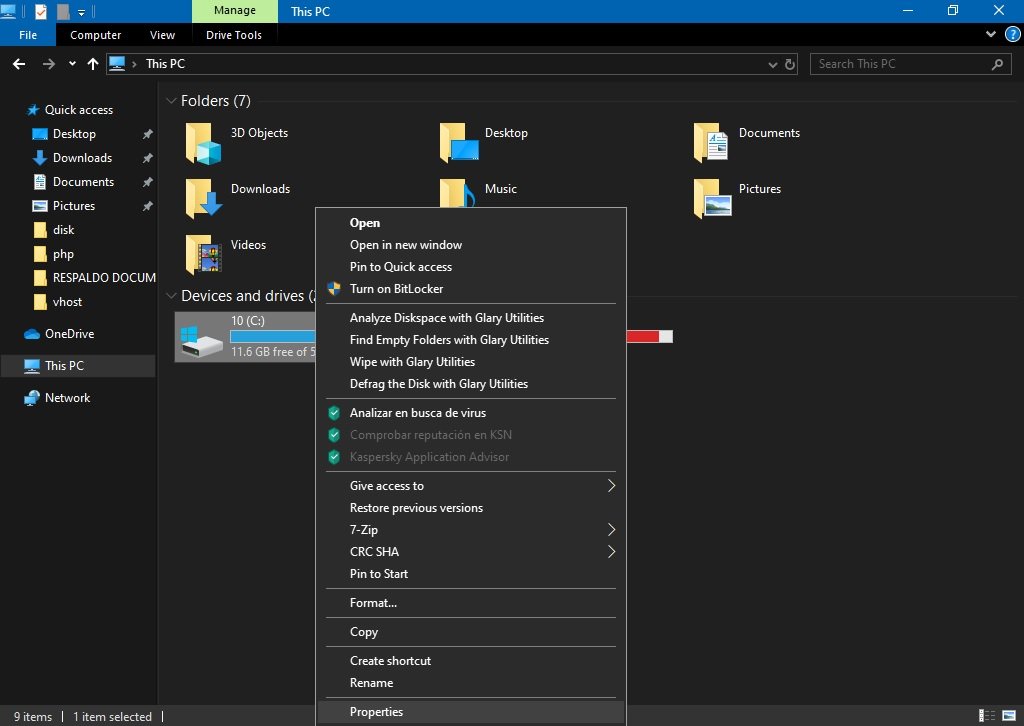
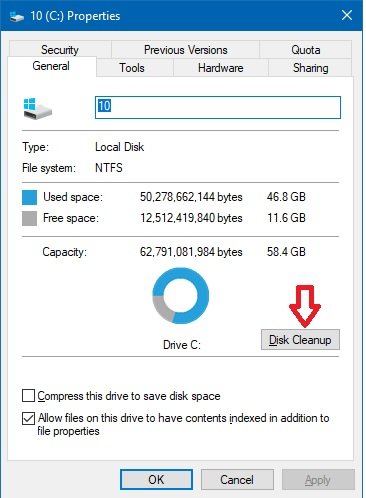
Once inside the properties, click on General tab and select the Disk Cleanup option to launch the tool:
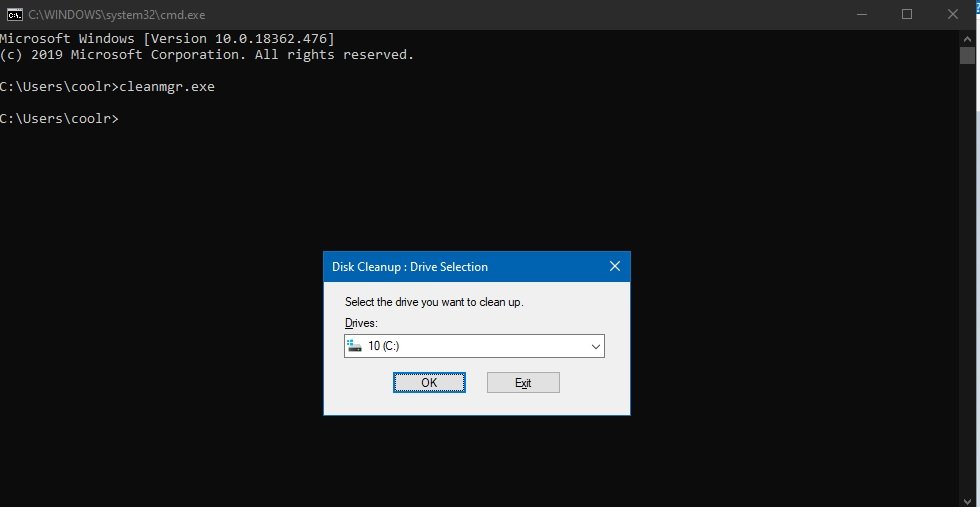
Option 3: Open Disk Cleanup using Command Prompt
The first thing you have to do is to open a CMD by typing CMD in the search bar:
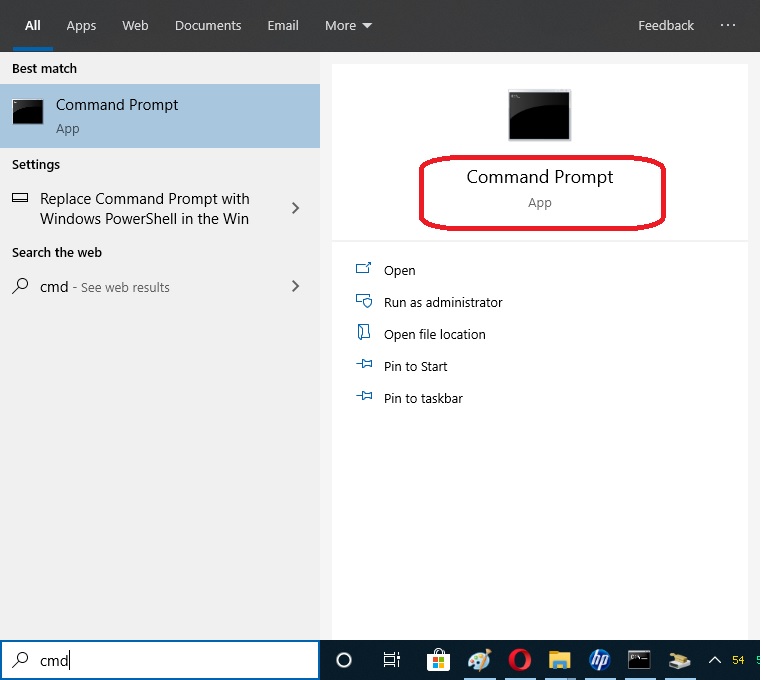
Once the Command Prompt is opened, you only have to type the following command: cleanmgr.exe. Press enter and the Disk Cleanup will be launched:
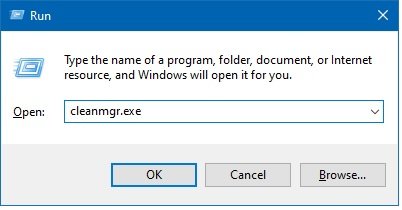
Option 4: Open Disk Cleanup using the run box
In this case, press the Win + R combination and execute the following command: cleanmgr.exe. The Disk Cleanup will be launched immediately:
Step 2: How to use Disk Cleanup Tool
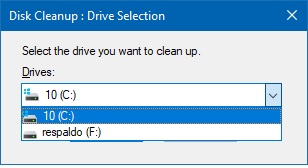
- After opening the Disk cleanup utility. Select the hard disk you want to clean up:

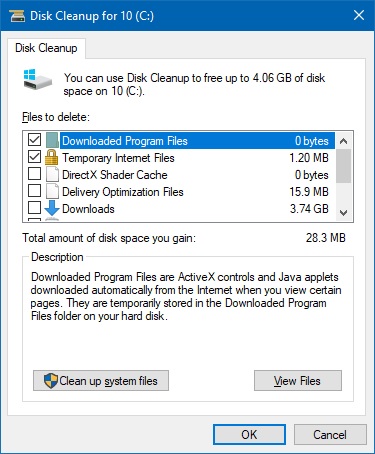
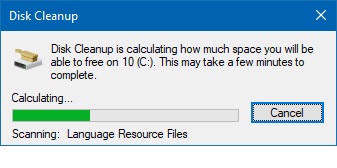
- After selecting the disk, the wizard will start analyzing the drive for possible files to be deleted. In the same way, the description of the same ones will appear, and the size that occupies. It is a very intuitive window and will allow selecting correctly what we want to eliminate (what to delete). Just check the corresponding checkbox and proceed to delete the selected files:

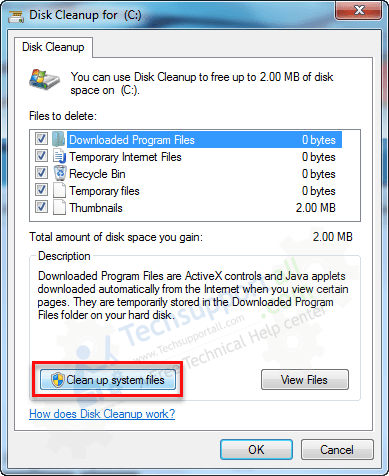
- However, if you want to do a deeper cleaning, just click on Clean up system files. Then select the unit to clean and let the wizard do its job:

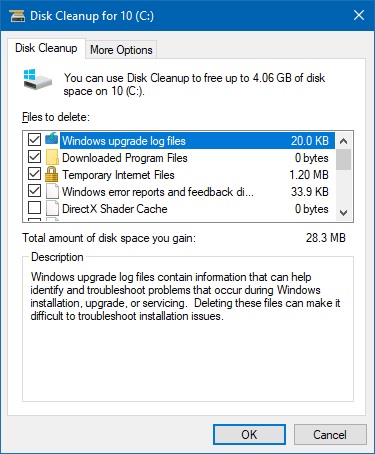
- The following window will show other types of files that we can remove to free up space on the hard drive:

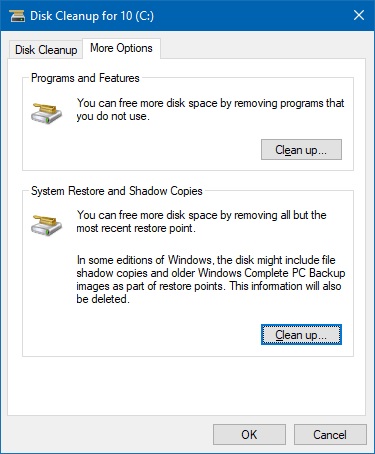
- This window is very similar to the previous one, however, it has a More Options tab. Click on it and the following menu will be displayed:

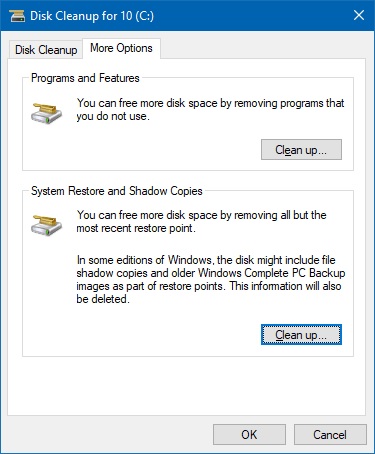
- Below are two additional options for freeing up space. The first of them will take us to uninstall the programs that we do not use. In the second option, you are invited to remove the oldest restore points. In the same way, it is possible to remove Windows restoration images:

- In this way we can free up space on the hard disk, so we can use storage for our files. We will now look at alternative methods for launching the Disk Cleanup.
Remove junk & backup system files
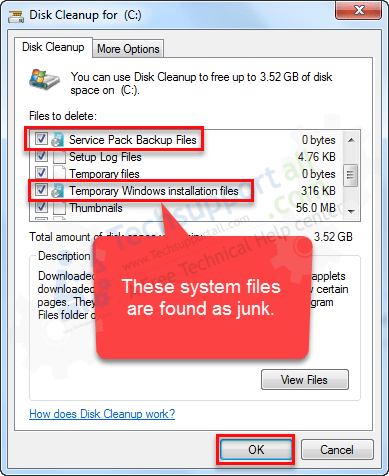
In this option, it will find system backup files and services pack backpack files additionally. Lets see how it works.
- When you are on the disk cleanup result screen, click on “Clean up system files“.

- Select the drive where you want to search and click on “OK“

- It found some backup and temporary Windows installation file. Click on OK.

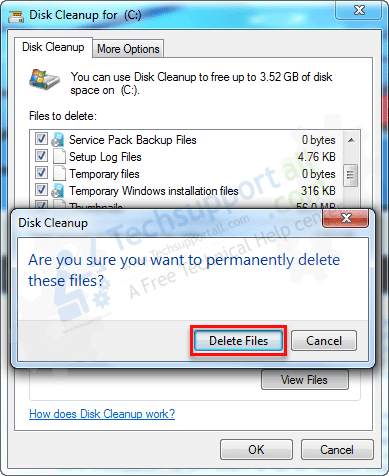
- Please click on “Delete files” button to confirmation for delete files.

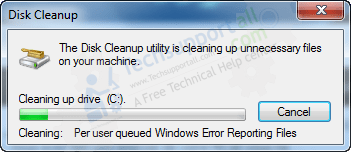
- It is deleting the selected files.

- That’s it.
What to delete through Disk cleanup?
Disk cleanup can be a very useful tool to keep our Windows devices in good shape. When opening this tool, you will be confronted with many options, so here are some tips on what to delete when using Disk Cleanup:
- The main target of the cleanup should be selected to clean:
- Downloaded Program Files.
- Temporary Internet Files.
- Recycle Bin since these are usually what takes the most space in your computer.
- Sysetm Logs Files.
- Temporary Files.
- Per user archived Windows Error Reporting.
- Per user queued Windows Error Reporting.
- System queued Windows Error Reporting.
- Check your temporary local files and recycle bin before deleting them, these are important to delete since they can take up space quickly but you may find things in them you might want to keep or you thought were lost.
- If your restore points take too much space (which seldom happens), make sure you only delete very old restore points and that there’s no malware in your PC before deleting them. Another healthy practice is to delete an old restore point after creating a new one.
- Windows error and crash files are not that important to keep if they’re sent, but they don’t take up much space anyway; delete at will.
- If you delete something you didn’t want to, there are ways to recover such files with recovery tools since “deleting” doesn’t delete things, but mark the space they occupied as “writable”. Make sure you don’t write anything new into the disk before recovering.
You can also use the third party tools to clean up Windows. Check out the Best PC Cleaner Software.
We have already mentioned Windows 10 complete user experience. By itself, it provides all the necessary tools to make daily tasks. Additionally, they have been improving their stability and performance. In fact, with the arrival of successive updates, problems and inconveniences are solved. However, as the system is used, temporary files are generated which accumulate on the hard disk. These files do not do anything. In fact, what they do is slow down the system.
FAQ:
Q: Where is disk cleanup in windows 10?
A: Disk cleanup located in the following location: %windir%\system32\cleanmgr.exe
Q: how to use disk cleanup windows 10?
A: We have provided the guide above how to run/use the Windows 10 disk cleanup. Please go to the how to use section.
Q: Could disk cleanup tool remove the Widows installation and updates junk files?
A: Yes, it removes these types of files, Here’s how.
