Windows 10 is a system that provides a comfortable user experience. However, this experience is different according to the type of equipment used. For example, in a laptop, the peripherals are integrated into the computer itself. Consequently, this offers us a portable and more comfortable use. Precisely in this post, we are going to study the failure of a peripheral such as the camera. As I mentioned, in a laptop is integrated as a webcam. Although, it is likely that desktop users also use USB cameras. These devices are very useful for taking photos or recording videos. They are also increasingly used in video calls and social networks. But like any device, it is likely to fail. For that reason, I’m going to show you how to solve the problem of the camera not working in Windows 10.
Solutions to fix ‘Camera is not working’ issue in Windows 10
- Make sure the camera is turned ON
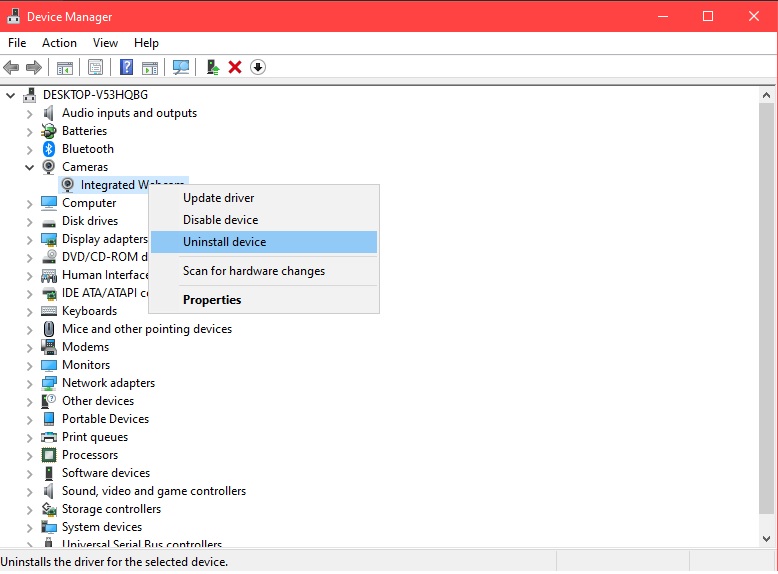
- Reinstall the Camera driver
- Enable the Camera
- Restore the system to backdate
- Check & Repair the system files
Solution 1: Turn on the Camera
Sometimes the most obvious solution is the right one. In fact, many times the camera does not work because it is simply disabled. In most laptops, this is activated using a combination of keys. It can be Fn + F5 or Fn + F7. A camera icon should be marked on that function key. It all depends on the model of your laptop. If you are not sure, a simple internet search on your computer and special keys will suffice. In the case of using a USB camera verify that it is well-connected properly.
Solution 2: Reinstall the Camera driver.
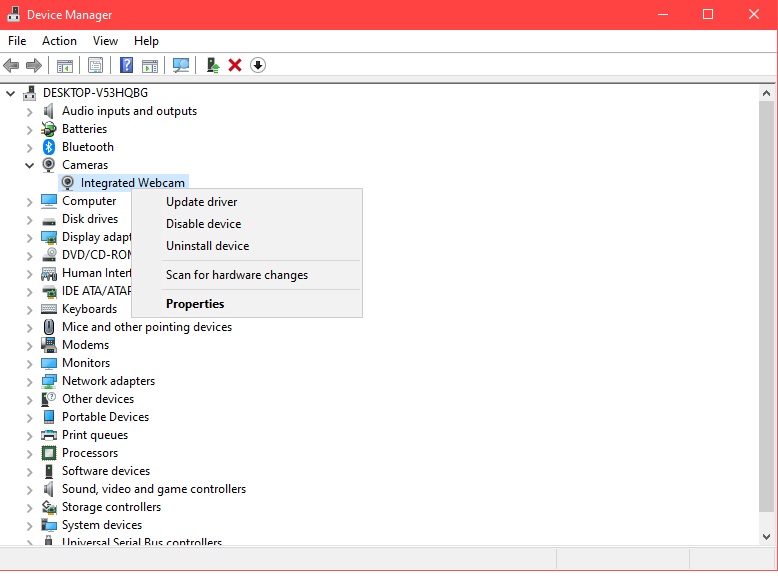
This problem is probably due to problems with the camera controller. To fix this you need to log in to the device manager. With this in mind press the Win + X combination:

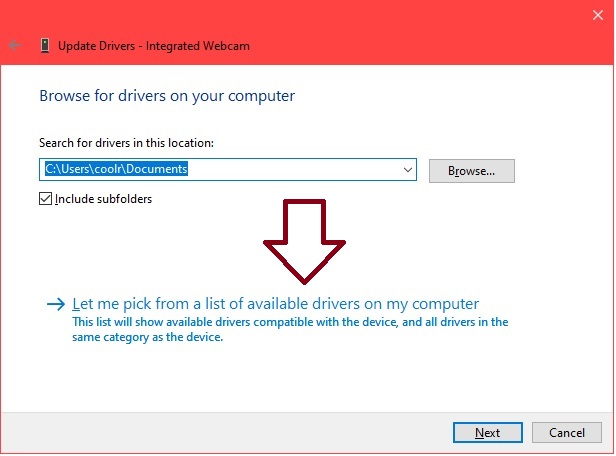
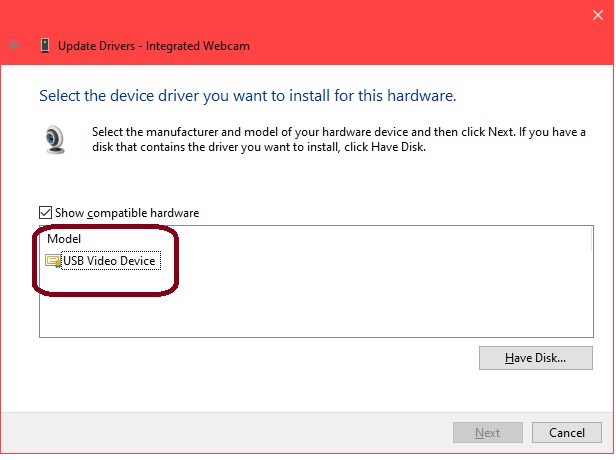
Then scroll down to Cameras. Next, click on the integrated webcam and select update driver. If the camera is a USB device, then locate the model and repeat the same procedure.
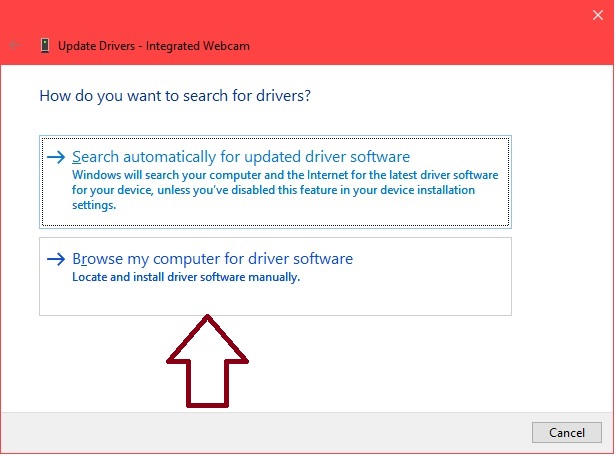
In the next window choose the controller from a list available on the computer.
Solution 3: Enable the Camera
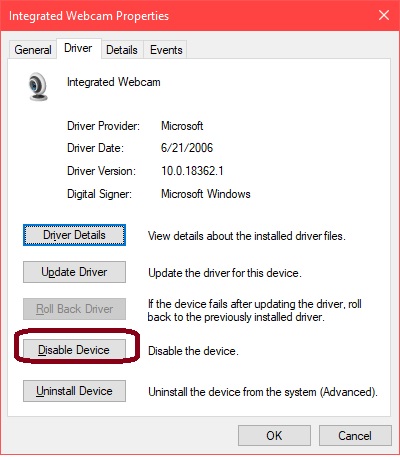
It is also advisable to check whether the device is enabled or not. To do this, go to the device manager, double-click on the camera. Then select the Controller tab and scroll down to enable or disable the camera:
Solution 4: Restore the system to backdate
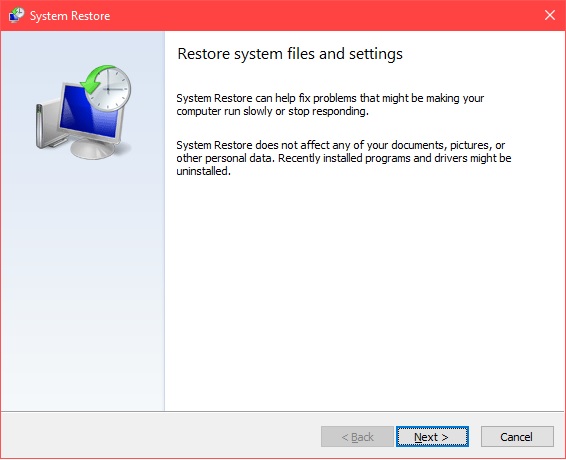
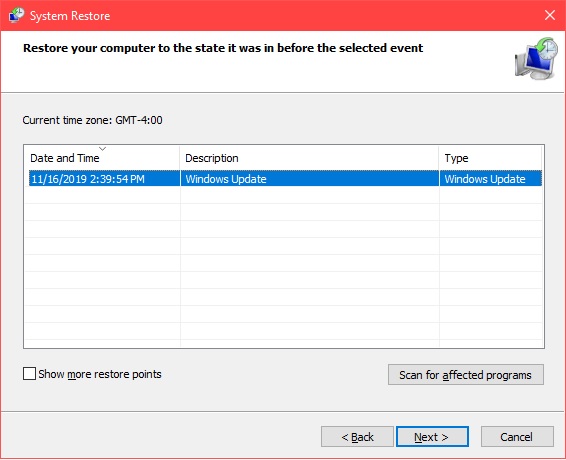
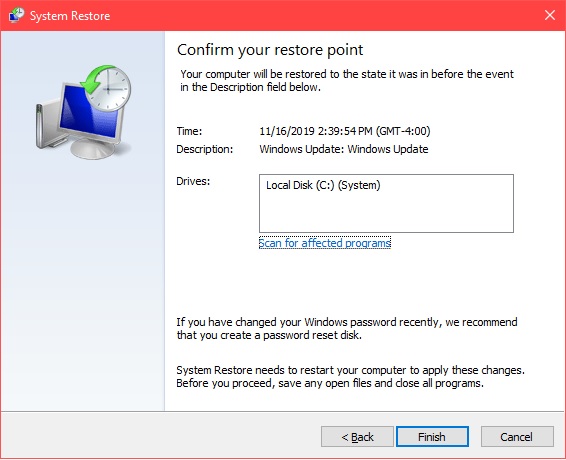
It is likely that the solution will be to restore the system to a previous point when the camera was working properly. With this intention, you have to enter to restore the system following this path: Control Panel → System and Security → System → System Protection
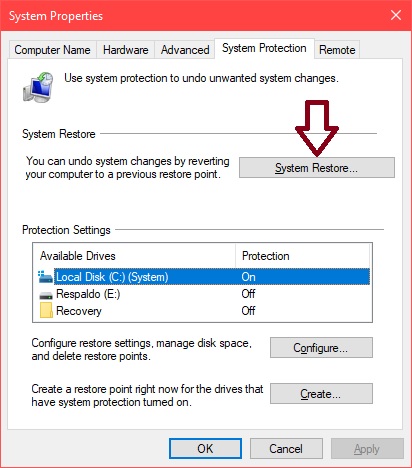
Then follow the wizard’s instructions to restore it. Click here to get more detail about to restore Windows 10 back date.
Solution 5: Check & Repair the system files
Damaged system files may cause this function not to load correctly. So let’s use a tool to locate those damaged files and replace them with others. Open a Command Prompt with administrator privileges and type the following command:
sfc /scannow

Finally, we have seen some solutions for the camera problem in Windows 10. No doubt, following these tips, you will be able to use it again. See you later!